A beautiful kitchen can still feel awkward when the layout, colours, or storage do not work together. That is why the best updates are not always the most expensive ones. These 40 kitchen design ideas will help you create a space that feels stylish, practical, and easy to enjoy every day. Whether you are planning a full renovation or making small changes, you will find smart inspiration for layouts, cabinets, lighting, storage, surfaces, and finishing touches that can completely refresh your kitchen.

1. Choose a Layout That Works for You
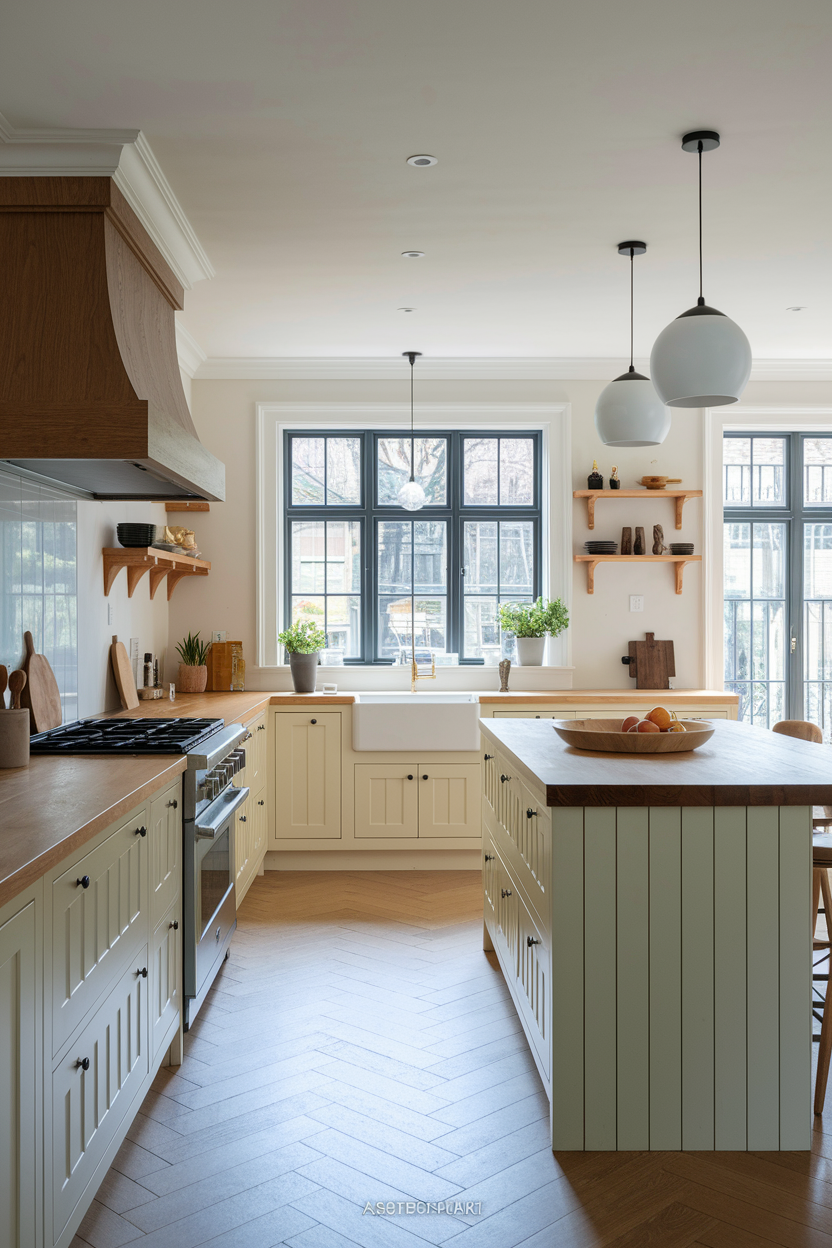
 

Realistic modern editorial photograph of a thoughtfully designed open-plan kitchen showing a practical L-shaped layout with a central island, clearly defined cooking, washing, preparation, and dining zones, warm white cabinets, natural oak details, uncluttered worktops, wide walkways, soft daylight from large windows, balanced proportions, clean blog-friendly styling, Pinterest-worthy composition, strong focus on the functional kitchen layout, no people, no text overlay, high-resolution interior photography, 2:3 vertical aspect ratio, small subtle “AstheticHaven” watermark in the bottom corner.

Start with the shape of the room because a good layout makes every other choice easier. An open-plan kitchen creates a social space that connects cooking, dining, and relaxing without hard visual barriers. A galley layout works well in narrow rooms by keeping appliances and counters within easy reach. An L-shaped kitchen opens one corner for a dining table or island, while a U-shaped layout gives busy households more worktop space and storage without making the room feel scattered or difficult to use.

Before choosing a layout, think about how you move between the sink, hob, fridge, and preparation area. Keep these points close enough for comfort, but leave clear walkways so doors and drawers can open safely. In a galley kitchen, place tall units at one end to avoid a boxed-in feeling. For open-plan rooms, use an island, rug, or lighting change to define the kitchen zone. A practical layout should support your daily routine rather than force you to change it.

2. Create a Colour Scheme You Will Still Love
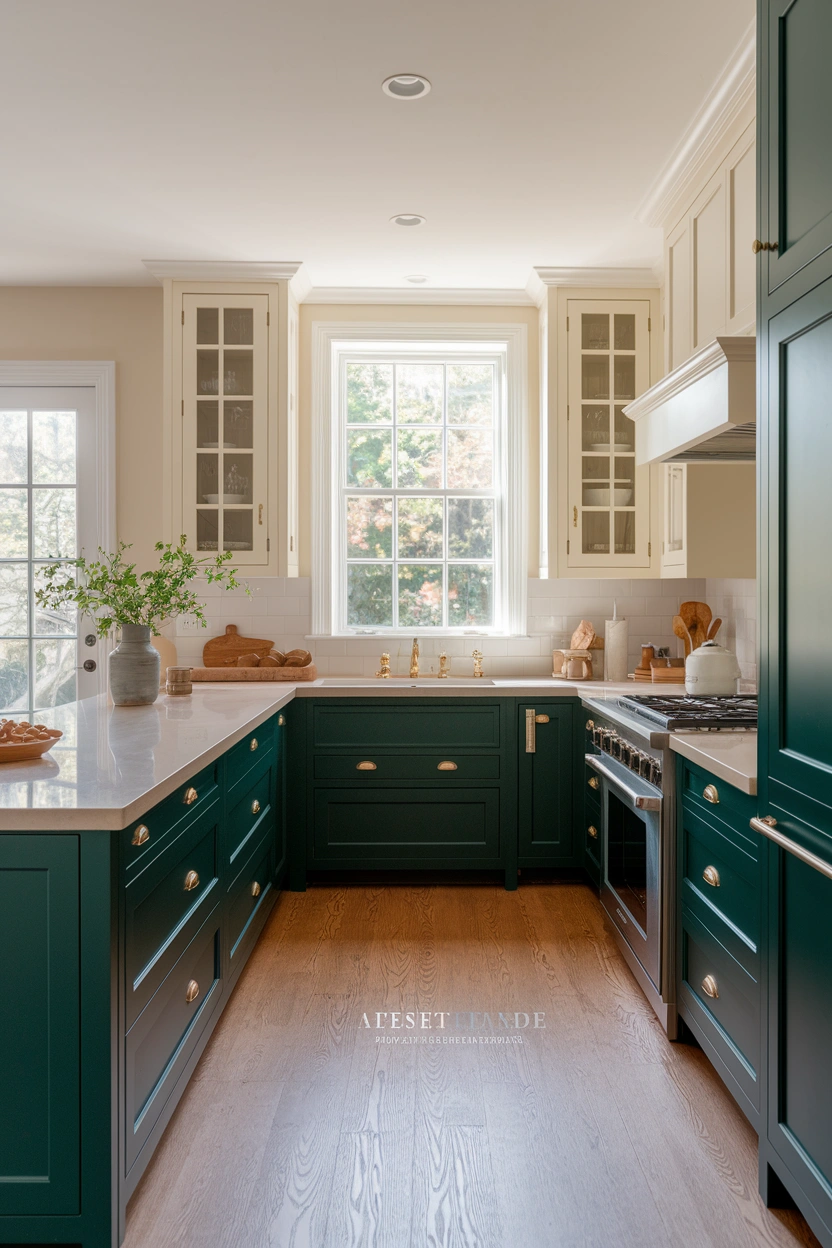
Realistic editorial interior photograph of an elegant two-tone kitchen featuring deep forest-green lower cabinets, warm cream upper cabinets, pale quartz worktops, brushed brass hardware, natural oak flooring, and soft neutral walls, balanced use of light and dark colours, gentle natural daylight, inviting atmosphere, clean and uncluttered blog-friendly composition, strong focus on the kitchen colour palette and cabinet contrast, no people, no text overlay, premium high-resolution photography, Pinterest-ready 2:3 vertical aspect ratio, small subtle “AstheticHaven” watermark near the bottom edge.


Colour can change the mood of a kitchen faster than almost any other design choice. A crisp white kitchen feels bright and timeless, especially in rooms with limited natural light. A two-tone scheme adds interest by pairing darker lower cabinets with lighter upper units. Deep navy, charcoal, or forest green creates a bold and cosy look, while warm neutral shades such as cream, mushroom, and soft beige make the room feel calm, welcoming, layered, and easy to style throughout the year.

Use colour in a way that suits the size and light level of your kitchen. Dark cabinets can look rich and dramatic, but balance them with pale counters, reflective tiles, or warm lighting. In smaller rooms, keep the main surfaces light and introduce stronger colour through an island or lower cupboards. Always test paint samples at different times of day because kitchen lighting can shift undertones. The right palette should feel fresh in the morning and comfortable in the evening.

3. Upgrade the Kitchen with Stylish Cabinets
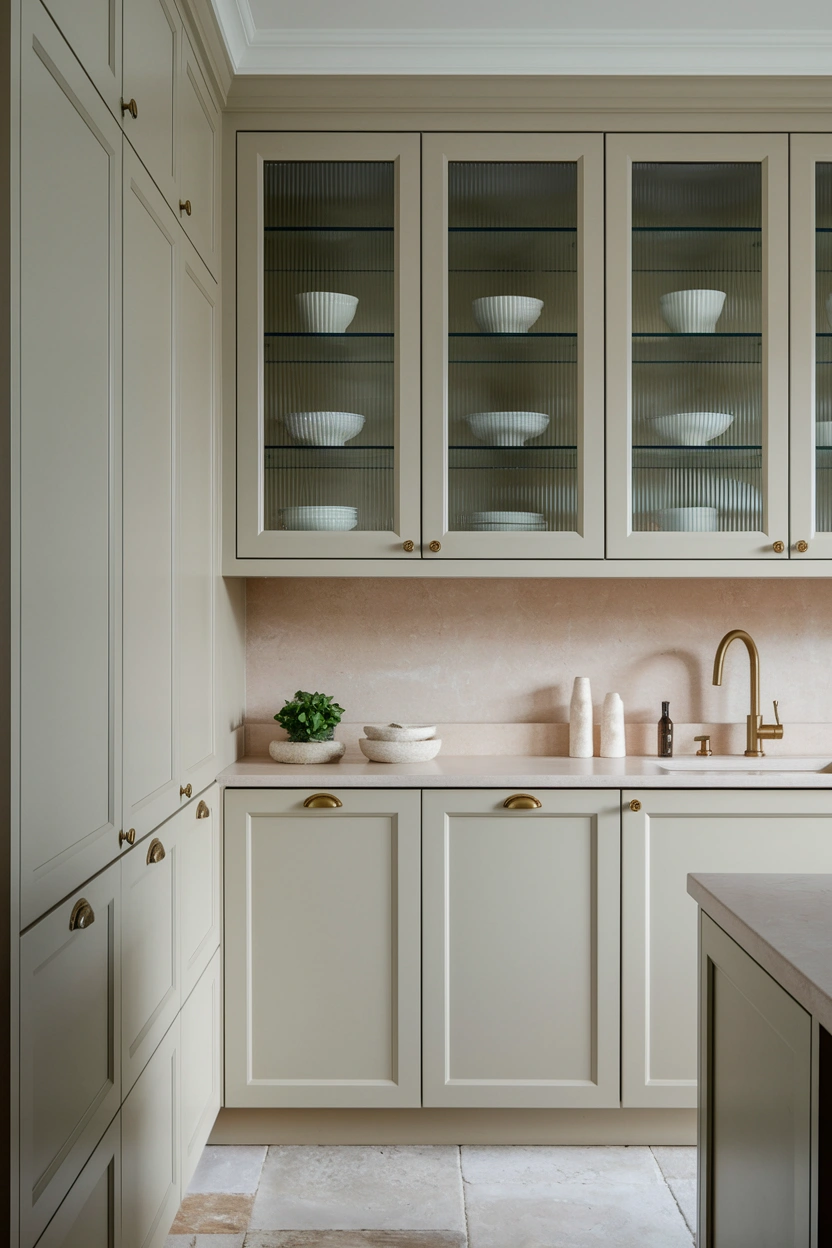
High-quality modern editorial photograph of a sophisticated kitchen displaying a balanced combination of classic Shaker cabinets, smooth flat-panel units, fluted-glass upper cupboards, and a natural wood cabinet section, ceiling-height storage, simple brass handles, pale stone counters, carefully styled ceramics behind glass, clean architectural lines, soft daylight, realistic materials and textures, uncluttered Pinterest and blog-friendly composition, strong focus on the cabinet styles and finishes, no people, no text overlay, 2:3 vertical aspect ratio, subtle “AstheticHaven” watermark in the lower corner.


Cabinet style sets the visual direction of the whole kitchen and often becomes its most noticeable feature. Classic Shaker cabinets bring simple detail that works in both modern and traditional homes. Flat slab doors create a clean, streamlined look with fewer visual breaks. Glass-front cabinets lighten a wall of storage and give you space to display attractive dishes. Mixed-material cabinetry, such as painted units combined with natural wood, adds warmth and depth without making the design feel too busy or carefully matched.

Choose cabinet finishes that can handle real life as well as look good in photos. Matt surfaces hide fingerprints better than very glossy doors, while textured wood grain can soften a sleek room. Use glass fronts only where you can keep shelves reasonably tidy, and place everyday items behind solid doors. For a more custom look, extend cabinets to the ceiling and add simple trim. Thoughtful cabinet choices can make an ordinary kitchen feel polished, balanced, and built for your home.

4. Make the Kitchen Island Work Harder
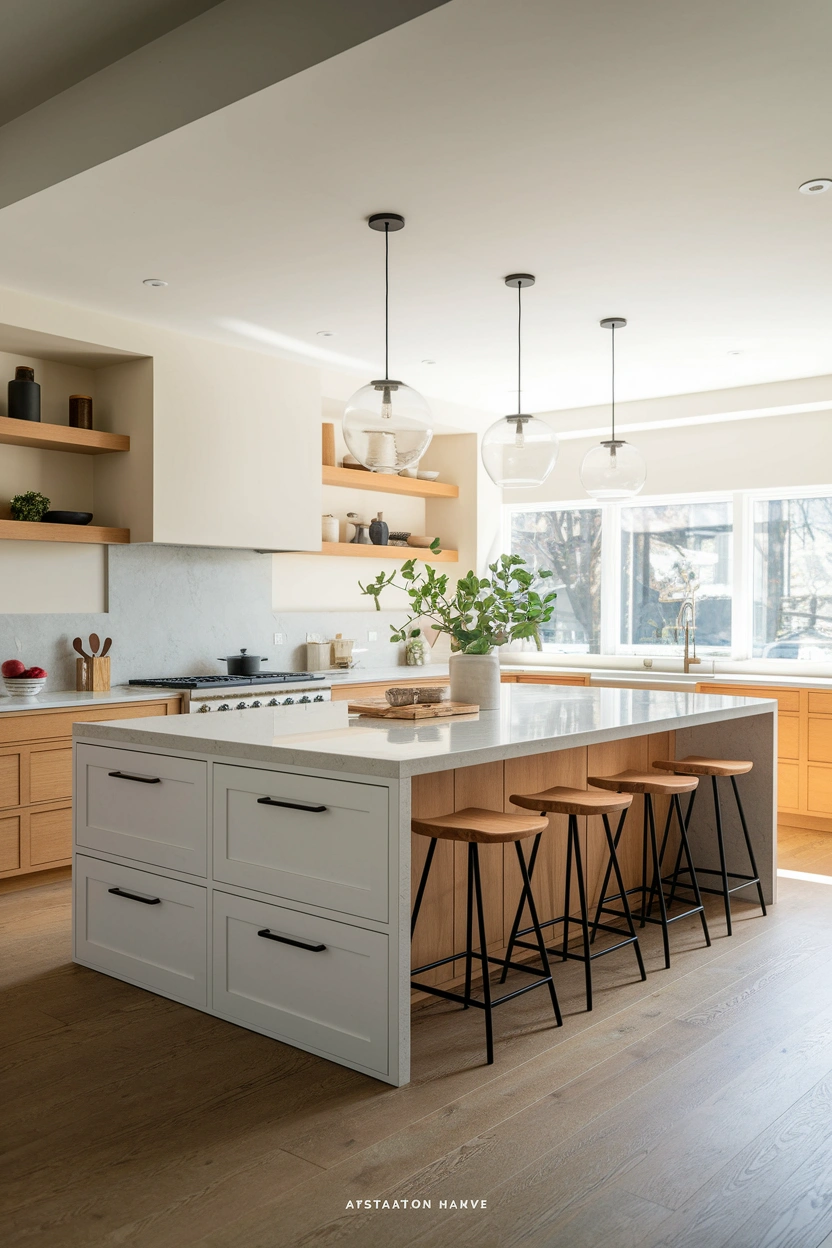
 

A kitchen island can become the hardest-working feature in the room when it is planned carefully around your everyday needs. A waterfall-edge island creates a smooth, high-end finish by continuing the worktop down the sides. A storage island adds deep drawers for pans, bowls, or small appliances. A seating island gives family and guests a relaxed place to gather, while a compact movable island offers extra preparation space without permanently crowding a smaller kitchen or blocking an important walkway.

Leave enough clearance around the island so people can move comfortably and open nearby appliances without bumping into one another. Around one metre is a useful starting point, although your room may need more near an oven or dishwasher. Choose stools that tuck underneath to keep walkways clear, and place sockets where you can use mixers or charge devices. In a small kitchen, a slim butcher’s block or wheeled cart may work better than a fixed island. Good proportions matter more than impressive size.

5. Combine Beautiful Worktops and Splashbacks
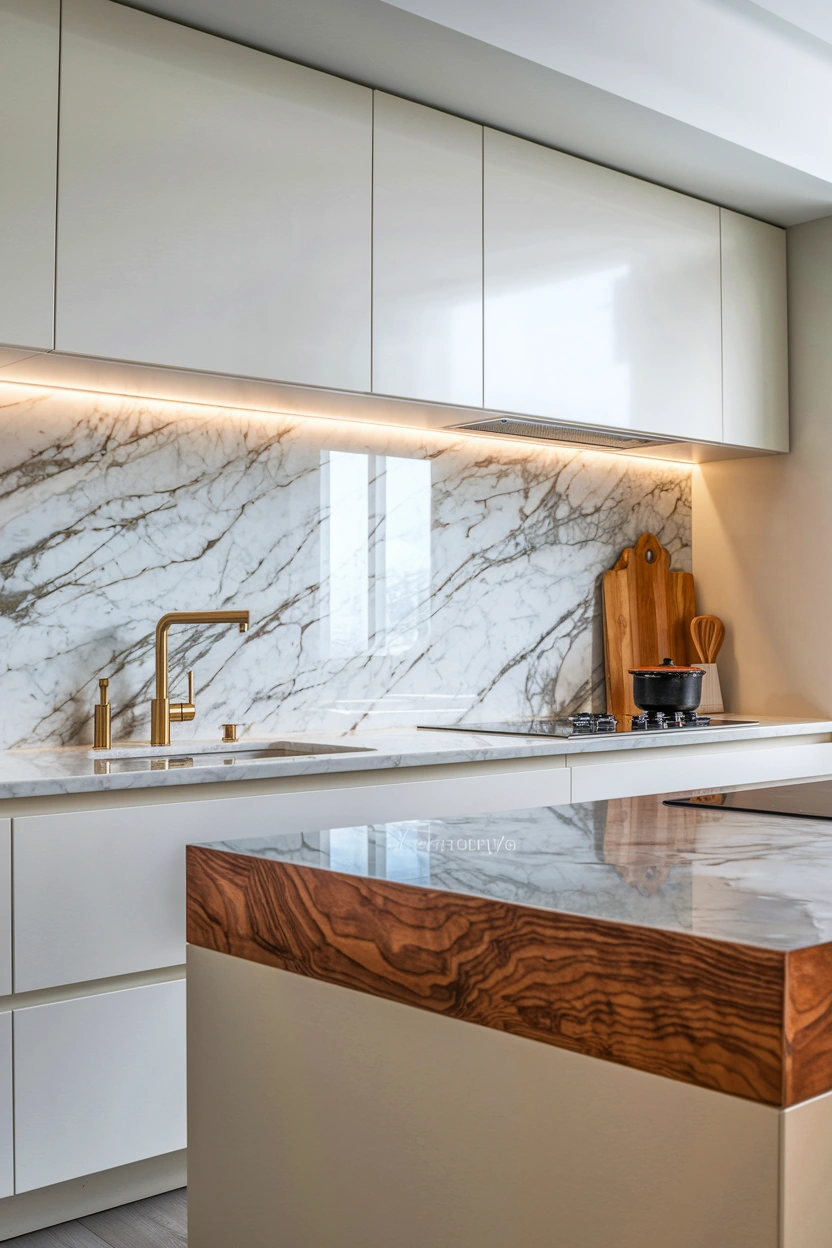
Close editorial view of an elegant kitchen preparation area featuring a durable white quartz worktop, a richly veined marble-look full-height splashback, a warm butcher-block island edge, under-cabinet lighting, minimal brass tapware, a few carefully placed cooking accessories, realistic material texture, clean grout-free surfaces, soft natural lighting, modern luxury atmosphere, strong visual focus on the worktop and splashback combination, no people, no text overlay, high-quality Pinterest and blog-friendly 2:3 vertical composition, small subtle “AstheticHaven” watermark in the lower corner.


Worktops and splashbacks give you a chance to add texture, pattern, and personality to the busiest part of the room. Durable quartz is easy to maintain and comes in many colours, making it a practical choice for busy homes. Marble-look surfaces bring elegant movement without always needing natural stone. Butcher block adds warmth and works especially well on an island. A full-height slab splashback creates a seamless feature wall that feels modern, luxurious, and easier to clean than rows of grout lines.

Match your surface choice to the way you cook and clean. Pale counters can make a kitchen feel larger, but heavily veined patterns may hide crumbs better between wipe-downs. Seal natural wood regularly and avoid leaving water around sinks. When using a dramatic splashback, keep nearby cabinets simple so the material can stand out. You can also repeat a worktop finish on a shelf or window ledge for a connected look. Practical surfaces should still bring character to the room.

6. Use Layered Lighting to Set the Mood
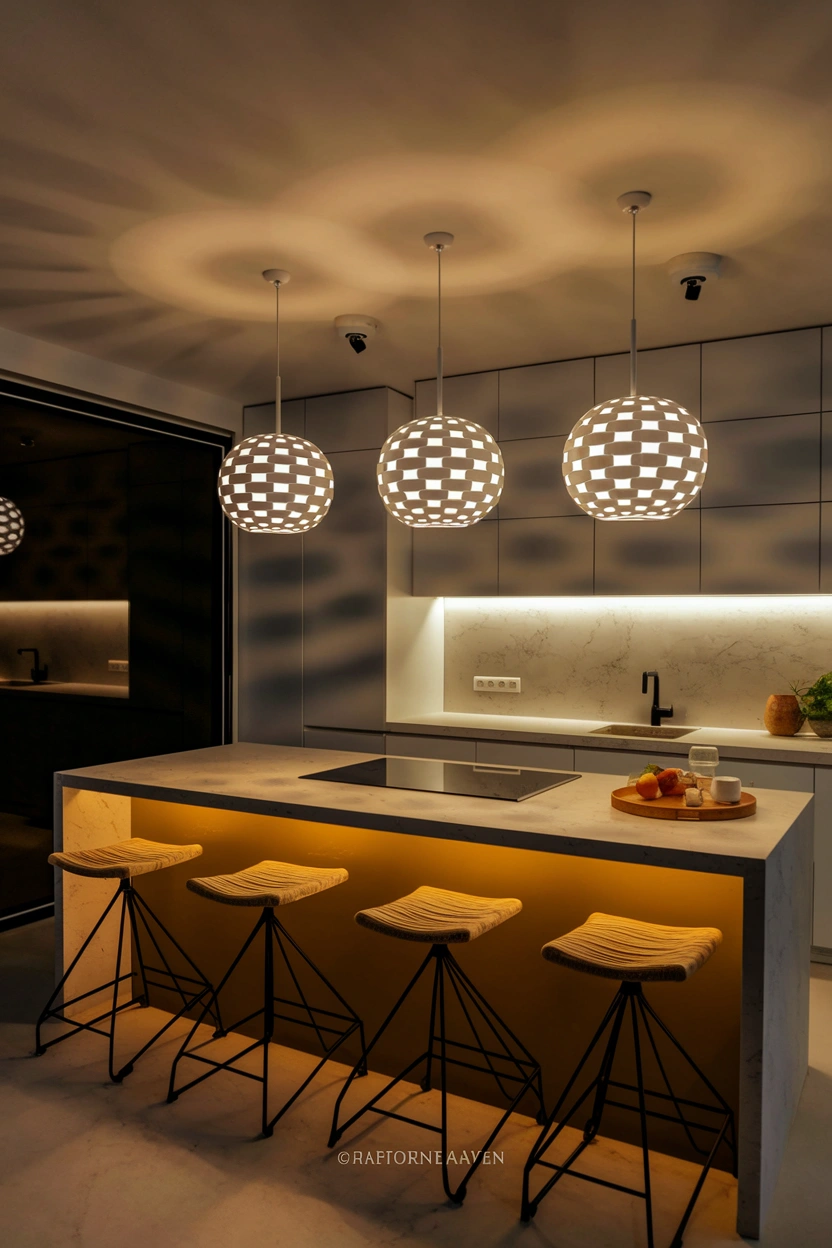
Realistic evening editorial photograph of a modern kitchen with layered illumination, three sculptural pendant lights above the island, warm under-cabinet task lighting, subtle recessed ceiling lights, and a small statement chandelier over a breakfast nook, soft reflections across stone worktops, dimmable warm atmosphere, balanced pools of light, clean cabinets and minimal styling, strong focus on the different kitchen lighting layers, no people, no text overlay, premium blog and Pinterest composition, 2:3 vertical aspect ratio, small subtle “AstheticHaven” watermark near the bottom.


Layered lighting makes a kitchen safer, warmer, and more attractive throughout the day and well into the evening. Pendant lights over an island create a clear focal point and help define the centre of the room. Under-cabinet lighting brightens preparation areas and removes shadows from worktops. Recessed ceiling lights provide even general light, while a statement chandelier over a dining nook adds personality and makes the kitchen feel connected to the rest of the home rather than purely practical.

Plan lighting before cabinets and ceilings are finished so wires and switches sit exactly where you need them. Use warm white bulbs for a comfortable atmosphere, but choose clear, bright task lighting near chopping and cooking zones. Put decorative lights on dimmers so the mood can change from breakfast to evening meals. Keep pendant fittings high enough to protect sightlines across an island. A thoughtful lighting plan can make simple finishes look more expensive and help the whole kitchen work better.

7. Add Storage That Simplifies Daily Life
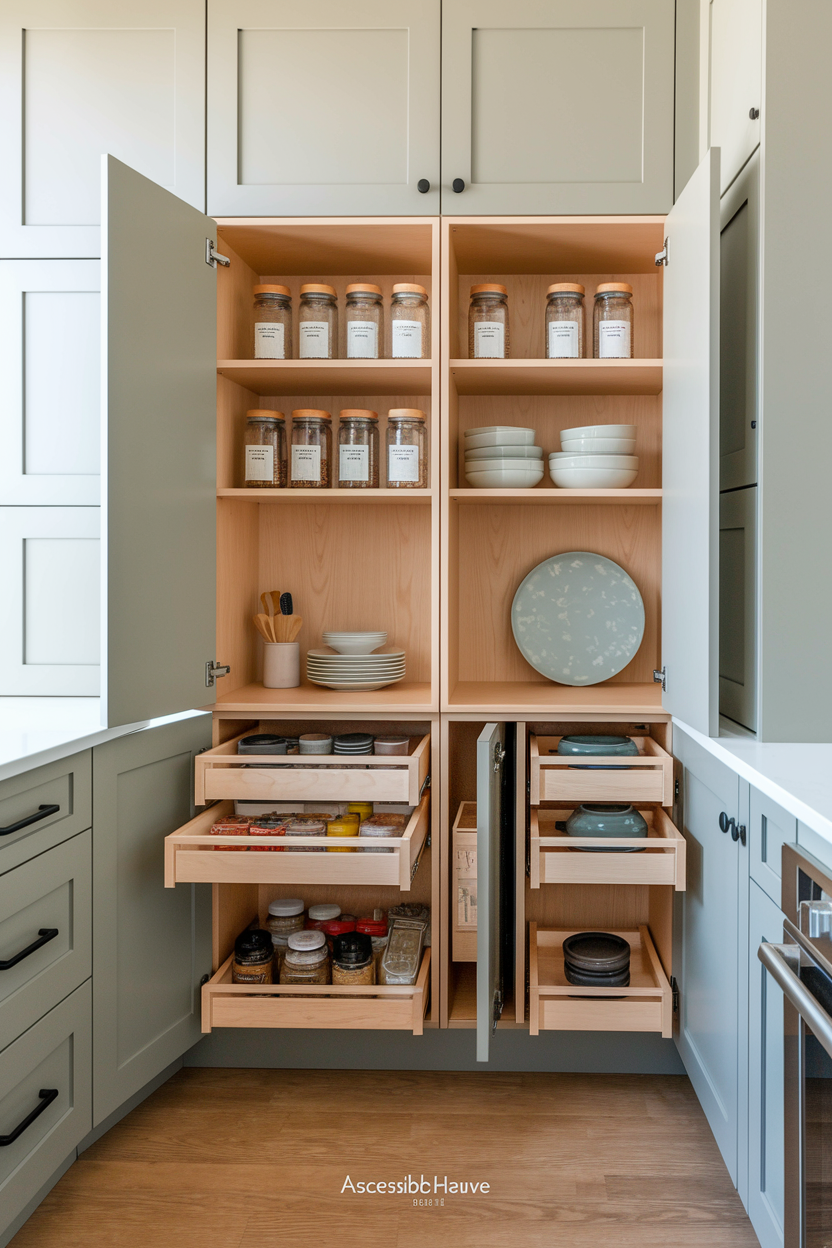
 

Smart storage keeps the kitchen calm because every item has a practical place and is easier to find. A full pantry wall can hold dry food, appliances, and serving pieces behind a clean run of doors. Pull-out cupboards make narrow spaces useful for spices, oils, or cleaning products. Corner drawers are easier to reach than deep corner cabinets, while open shelves create an airy display area for everyday plates, jars, or cookbooks that deserve to stay visible and close at hand.

Store items close to where you use them to reduce unnecessary movement. Keep pans near the hob, mugs near the kettle, and plates close to the dishwasher. Use deep drawers for heavy cookware because they are easier to access than low shelves. If you add open shelving, limit the colour palette and leave some empty space so it does not look crowded. The best storage design is not about hiding everything; it is about making daily tasks feel simple and organised.

8. Make a Small Kitchen Feel More Spacious
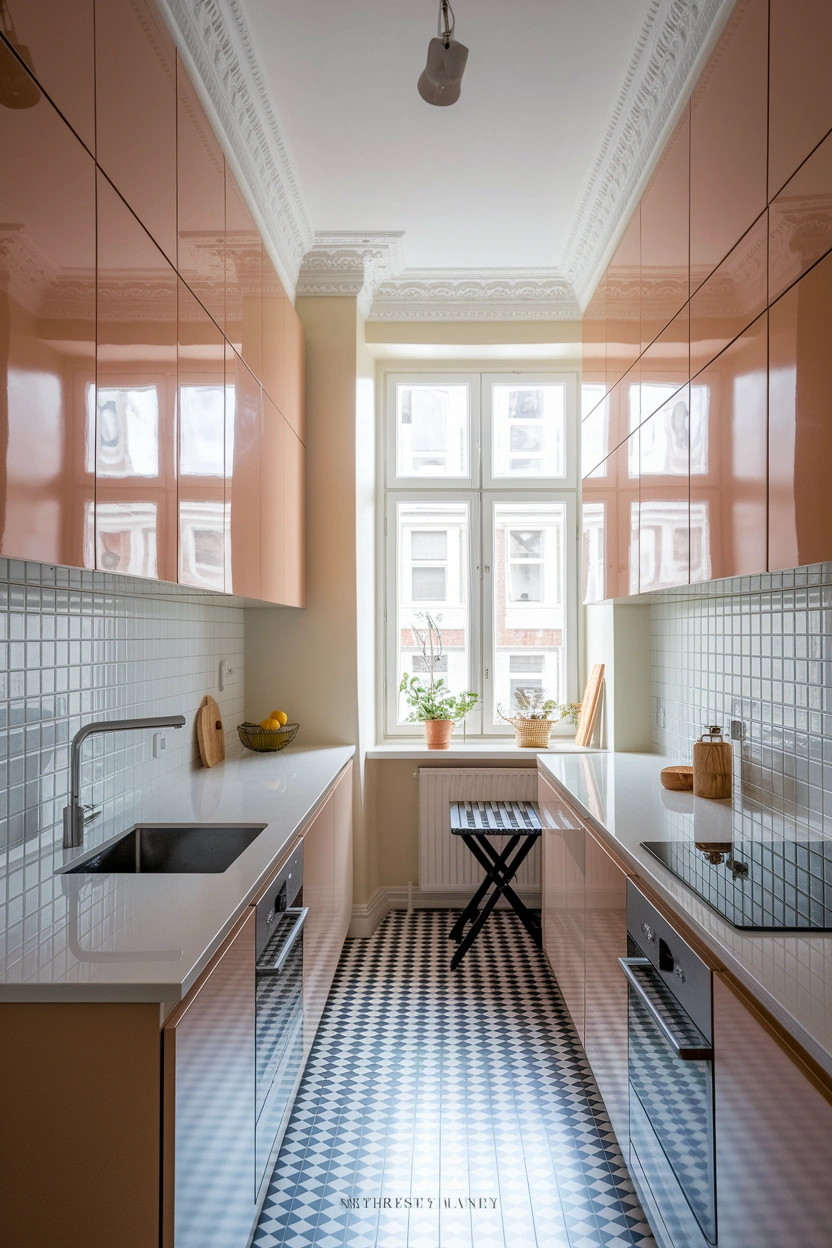
 

Small kitchens can feel stylish and comfortable when every design choice supports light, storage, and easy daily movement. A pale colour palette helps walls and cabinets recede, making the room feel more open. Reflective surfaces, including glossy tiles or mirrored splashbacks, bounce light into darker corners. Ceiling-height cabinets use vertical space without increasing the footprint. A fold-down table or wall-mounted breakfast bar creates a useful dining spot that can disappear when extra floor space is needed for cooking or entertaining.

Avoid filling every wall with heavy cabinets because a little breathing room can make a compact kitchen feel larger and less boxed in. Use slim handles, integrated appliances, and simple lines to reduce visual clutter. Choose one strong feature, such as patterned flooring or a colourful splashback, instead of adding several competing details. Keep counters mostly clear by storing appliances in a cupboard or dedicated breakfast station. In a small room, careful editing often creates more impact than adding more decoration.

9. Bring Warmth in with Natural Materials
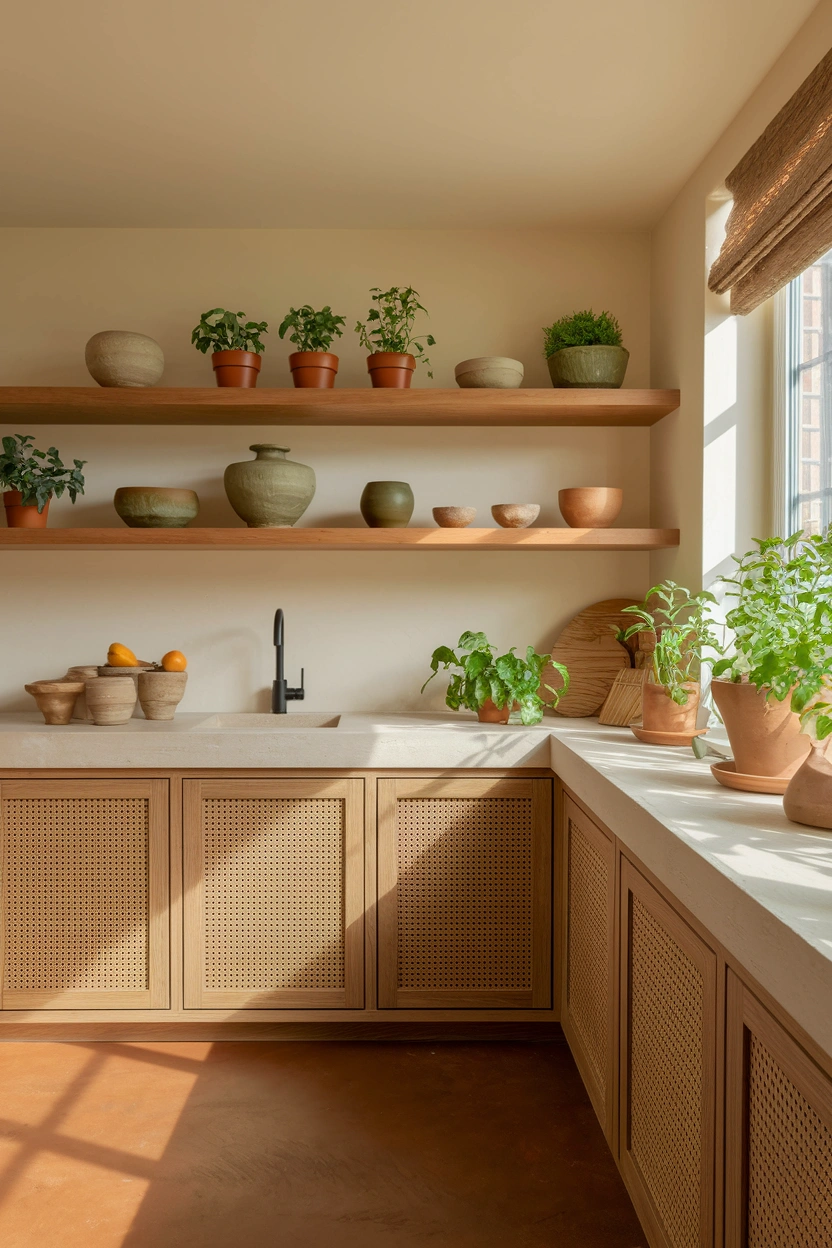
Warm modern editorial photograph of a nature-inspired kitchen featuring oak cabinets, open timber shelves, lightly textured stone worktops, handmade clay accessories, olive-green accents, potted herbs near a bright window, natural woven details, warm brown flooring, and gentle sunlight, realistic organic textures, calm uncluttered atmosphere, clean blog-friendly styling, strong focus on wood, stone, plants, and earthy colours, no people, no text overlay, high-quality Pinterest composition in a 2:3 vertical aspect ratio, subtle “AstheticHaven” watermark in the lower corner.


Natural materials make a kitchen feel relaxed, warm, and connected to the outdoors in a simple, lasting way. Wood cabinets or open shelves bring visible grain and softness to hard surfaces. Stone counters, tiles, or accessories add subtle texture and a sense of permanence. Herbs and leafy plants introduce fresh colour near windows or sinks. Earthy shades such as clay, olive, sand, and warm brown tie these materials together and create a grounded palette that feels inviting rather than overly polished or staged.

You do not need to use natural material on every surface to achieve this look. Start with one feature, such as an oak island, stone splashback, or timber shelf, and repeat the tone through smaller details. Choose plants that suit the light available, and use simple pots that do not compete with the room. Natural finishes often change with age, so embrace small marks and colour shifts. These details add character and help the kitchen feel lived in, personal, and comfortable.

10. Blend Modern Style with Vintage Character
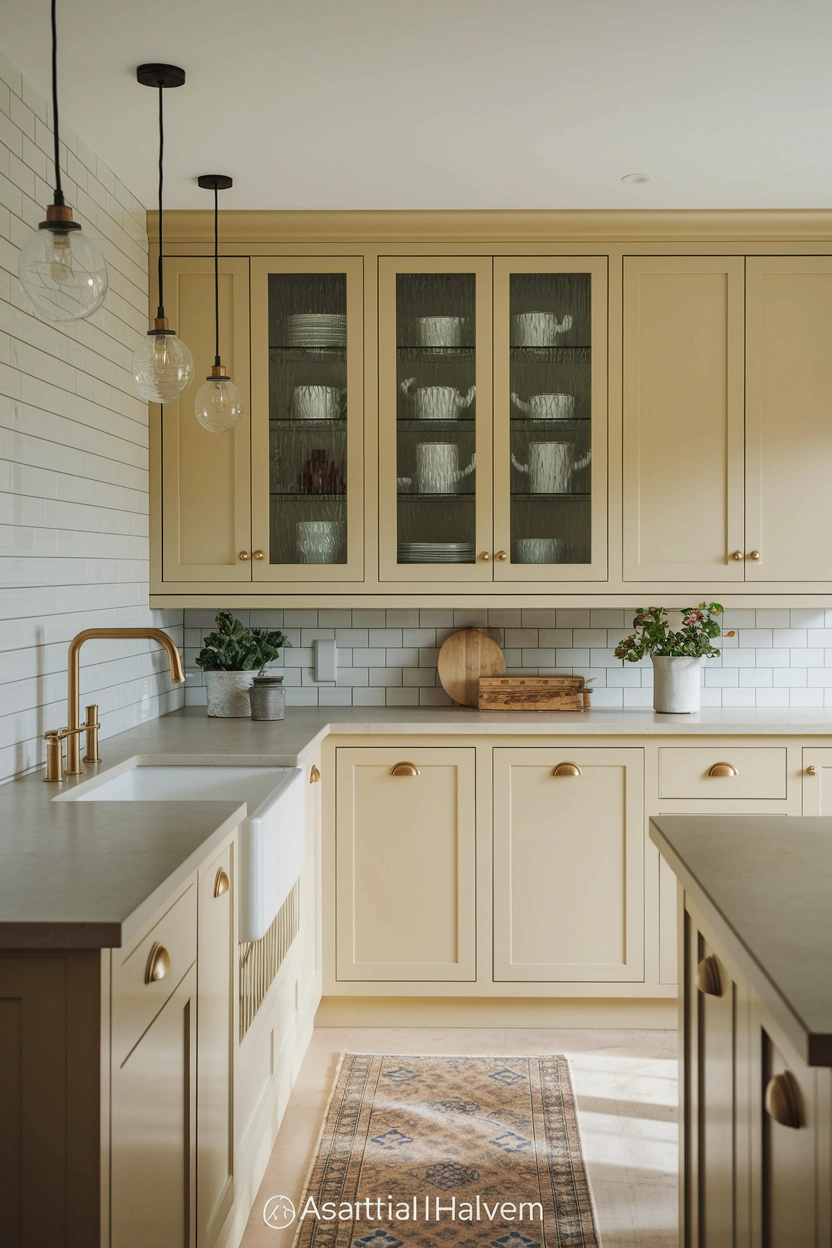
Realistic editorial kitchen photograph blending modern and vintage design, featuring simple warm-white cabinets, brushed brass taps and handles, an apron-front farmhouse sink, fluted-glass cupboard doors, a faded vintage-style runner, slim modern pendant lighting, pale stone counters, and streamlined integrated storage, balanced old-and-new atmosphere, soft morning daylight, clean Pinterest and blog-friendly styling, strong focus on the vintage details within the modern kitchen, no people, no text overlay, high-resolution 2:3 vertical composition, small subtle “AstheticHaven” watermark near the bottom.

A mix of modern and vintage details can give a kitchen more personality than one strict style ever could. Brushed brass taps and handles add warmth to simple cabinets without feeling too formal. A vintage runner brings colour and softness to the floor while protecting busy walkways. Fluted glass doors offer texture and partial privacy for stored items. A farmhouse sink creates a strong traditional feature that still looks fresh when paired with modern worktops, lighting, and streamlined storage throughout the room.

Keep the mix balanced by choosing one or two vintage features and letting modern elements create a clean background. Repeat metal finishes in a few places so taps, handles, and lights feel connected. Choose a washable flatweave runner for easy care, and use fluted glass where you want light without a full view of the contents. Pair a farmhouse sink with simple cabinetry to avoid a themed look. The result should feel collected over time, not copied from one showroom display.


11. Turn the Range Hood into a Statement Feature
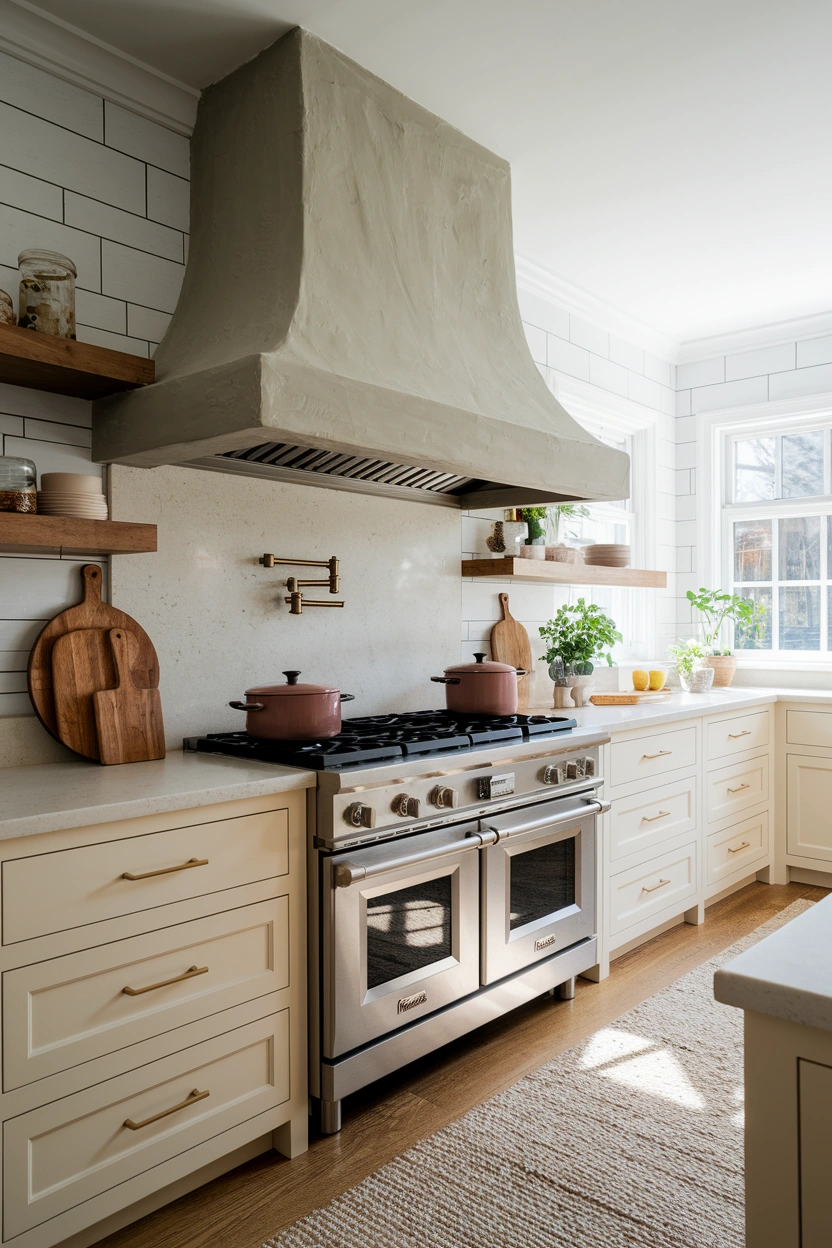
Realistic modern editorial kitchen photograph featuring a dramatic plaster range hood above a professional cooker, warm white cabinetry, pale stone splashback, natural oak details, soft brass accents, balanced symmetrical styling, clean counters, gentle natural daylight, strong focus on the sculptural range hood, luxurious but achievable home interior, Pinterest and blog-friendly composition, no people, no text overlay, high-resolution photography, 2:3 vertical aspect ratio, small subtle “AstheticHaven” watermark in the lower corner.


A range hood does not have to disappear into the background. Turning it into a statement feature can give the cooking area a stronger visual centre and make the whole room feel more considered. Plaster, wood, metal, and stone-covered hoods each create a different mood. A smooth plaster hood suits calm modern kitchens, while a dark metal design adds contrast. Extending the hood toward the ceiling can also make the room appear taller and give basic cabinets a more custom appearance.

Keep the surrounding area simple so the hood remains the main feature. Use a plain splashback, balanced cabinets, and minimal accessories around the cooker. The hood should also be wide enough to work properly with the hob below it, so appearance should never replace function. When using wood or decorative materials, confirm that they are suitable for kitchen heat and moisture. A carefully designed range hood can make an ordinary cooking wall feel architectural, polished, and memorable.

12. Build a Comfortable Breakfast Nook
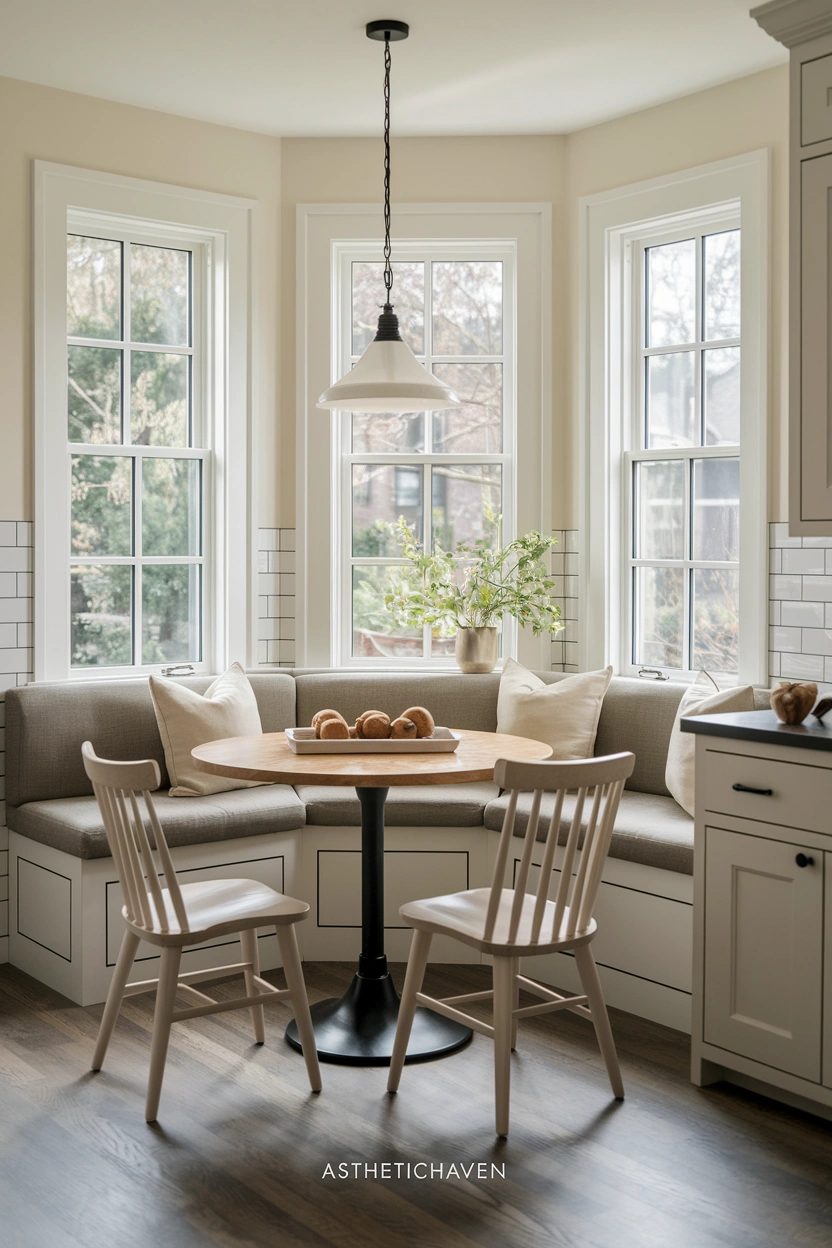
Realistic editorial photograph of a cosy kitchen breakfast nook beside a bright window, built-in upholstered bench seating, round oak dining table, two simple chairs, soft neutral cushions, warm pendant light, pale cabinetry nearby, natural morning sunlight, uncluttered surfaces, inviting family-friendly atmosphere, strong focus on the breakfast nook and seating arrangement, no people, no text overlay, clean Pinterest-friendly styling, high-resolution 2:3 vertical composition, subtle “AstheticHaven” watermark at the bottom edge.


A breakfast nook can turn an unused kitchen corner into one of the most welcoming places in the home. Built-in bench seating uses wall space efficiently and can provide hidden storage underneath. A round table improves movement in a tight area because it has no sharp corners. Soft cushions, warm lighting, and a nearby window make the space feel comfortable enough for morning coffee, family meals, homework, or quiet conversations throughout the day without requiring a separate formal dining room.

Choose durable, easy-clean fabrics because kitchen seating will face crumbs, spills, and regular use. Keep the table size in proportion with the bench so everyone can sit comfortably without blocking a walkway. Wall lights or a centred pendant can define the nook and make it feel intentional. Add one or two cushions for colour, but avoid overcrowding the seat. With careful planning, a small dining corner can bring warmth, function, and personality to your kitchen.

13. Hide Small Appliances in an Appliance Garage
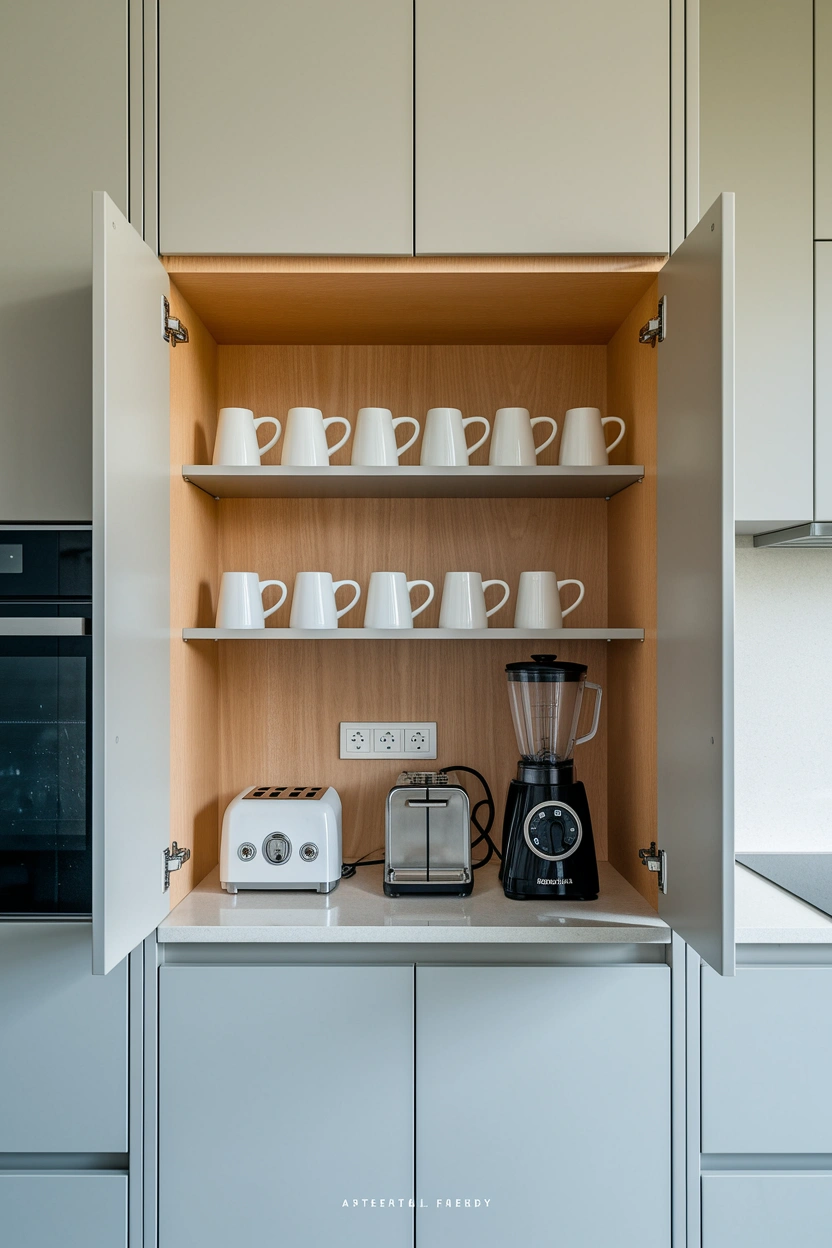
Realistic close editorial view of a modern kitchen appliance garage with retractable cabinet doors opened to reveal a toaster, coffee machine, blender, and neatly arranged mugs, integrated electrical sockets, warm oak cabinet interior, pale quartz worktop, clean surrounding cabinetry, soft natural lighting, organised and practical appearance, strong focus on concealed small-appliance storage, no people, no text overlay, Pinterest-friendly 2:3 vertical composition, premium high-resolution detail, small subtle “AstheticHaven” watermark near the bottom.


An appliance garage keeps frequently used machines close at hand without leaving the worktop permanently crowded. It can sit inside a tall cabinet, in a corner, or directly above the counter with doors that slide, lift, or fold away. Coffee makers, kettles, toasters, and blenders can remain plugged in and ready to use. When the doors close, the kitchen instantly looks calmer, making this one of the smartest kitchen design ideas for people who prefer clean, open surfaces.

Plan enough height and depth for every appliance, including space for lids, handles, and steam. Install safe electrical sockets inside the cabinet and follow the manufacturer’s ventilation guidance. A pull-out shelf can make heavier machines easier to reach, while a wipeable interior protects the cabinet from spills. Store matching supplies nearby, such as coffee beans, filters, or bread. A well-designed appliance garage saves time each morning while keeping the kitchen tidy and visually balanced.

14. Choose Integrated Appliances for a Seamless Look
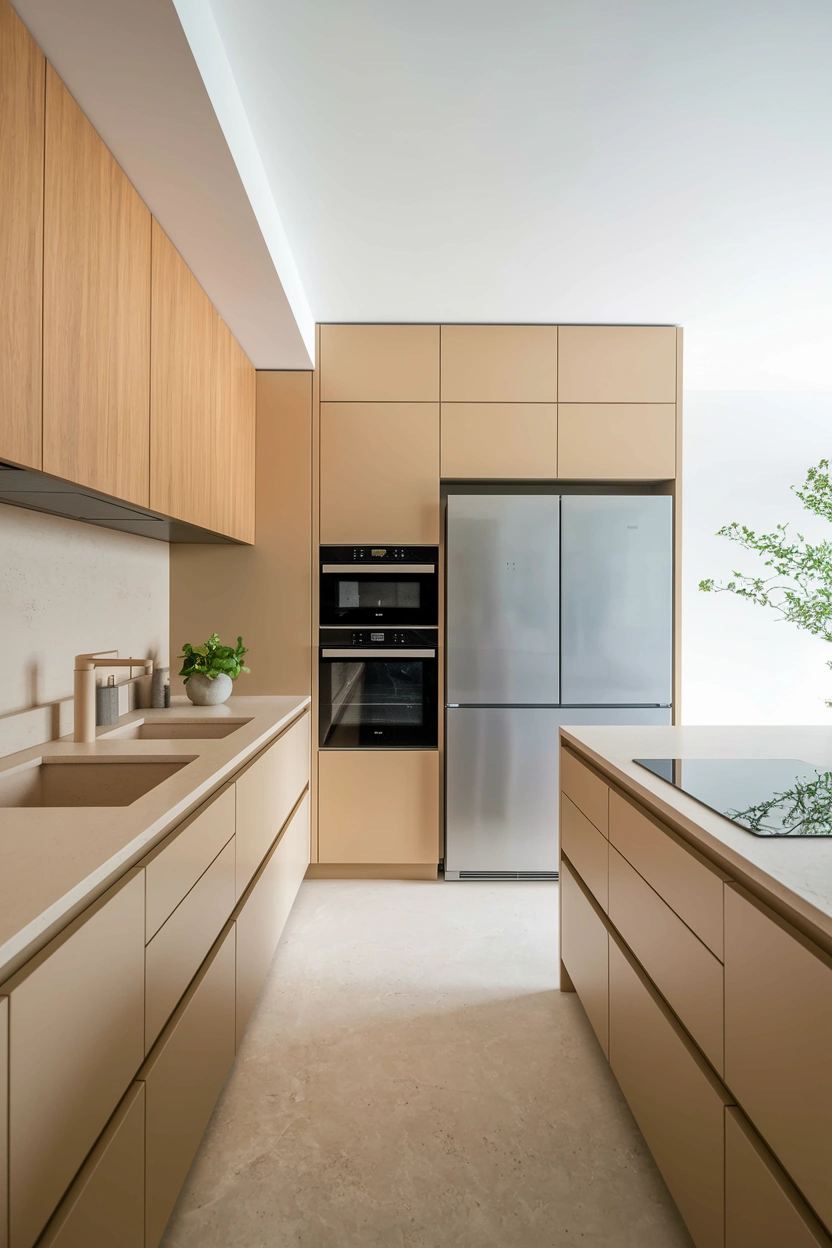
High-quality realistic editorial kitchen photograph with fully integrated refrigerator, concealed dishwasher, built-in oven, flush induction hob, smooth handleless cabinets, warm beige and natural oak palette, pale stone worktops, clean uninterrupted cabinet lines, soft natural light, minimal accessories, sophisticated modern atmosphere, strong focus on seamless integrated appliances, no people, no text overlay, blog-friendly and Pinterest-ready 2:3 vertical composition, small subtle “AstheticHaven” watermark in the lower corner.


Integrated appliances sit behind matching cabinet panels, helping a kitchen feel calmer and more spacious. Refrigerators, dishwashers, and extractor systems can blend into the room instead of interrupting the design with large areas of metal or black glass. This approach works especially well in open-plan homes, where the kitchen is visible from the living area. Concealed appliances also allow beautiful cabinet colours and materials to become the main focus rather than letting technology dominate the room.

Measure carefully before ordering integrated units because appliance and cabinet sizes must match correctly. Make sure doors can open fully without hitting walls, islands, or handles. Built-in appliances can cost more than freestanding models, so use them where visual continuity matters most. You might conceal the refrigerator and dishwasher while leaving a stylish range cooker visible. When planned properly, integrated appliances create a smooth, organised kitchen that feels connected to the rest of the home.

15. Style Open Shelves Without Creating Clutter
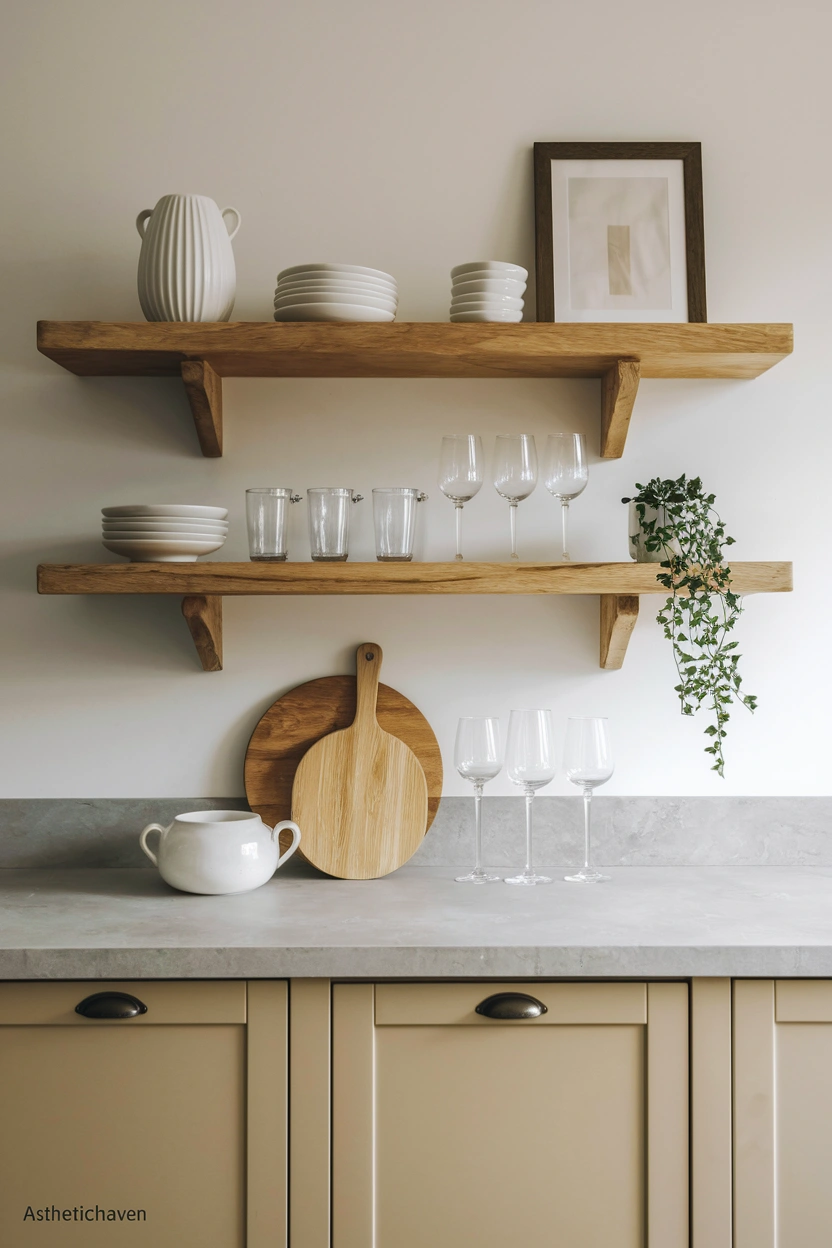
Realistic modern editorial photograph of two natural oak floating shelves above a pale stone kitchen worktop, carefully arranged white ceramics, clear glassware, a small trailing plant, wooden chopping boards, and one framed art piece, warm neutral cabinets below, soft daylight, balanced negative space, clean uncluttered styling, strong focus on the open shelving display, no people, no text overlay, premium Pinterest and blog-friendly 2:3 vertical aspect ratio, subtle “AstheticHaven” watermark near the bottom.


Open shelves can make a kitchen feel lighter while giving everyday objects a decorative purpose. They work well for plates, glasses, serving bowls, cookbooks, and a few attractive accessories. Wood shelves add warmth, while painted shelves can blend into the wall for a quieter look. The key is to leave visible space between items. When every centimetre is filled, the display can quickly feel messy instead of relaxed, making the room harder to clean and visually overwhelming.

Choose objects with similar colours or materials so the arrangement feels connected. Place heavier items on lower shelves and keep frequently used pieces within comfortable reach. A small plant, framed print, or ceramic vase can soften practical stacks of dishes, but avoid adding decoration that serves no purpose. Wipe shelves regularly because cooking dust and grease can collect on exposed surfaces. With thoughtful editing, open shelving can add character without sacrificing order or useful kitchen storage.

16. Mix Metal Finishes with Confidence
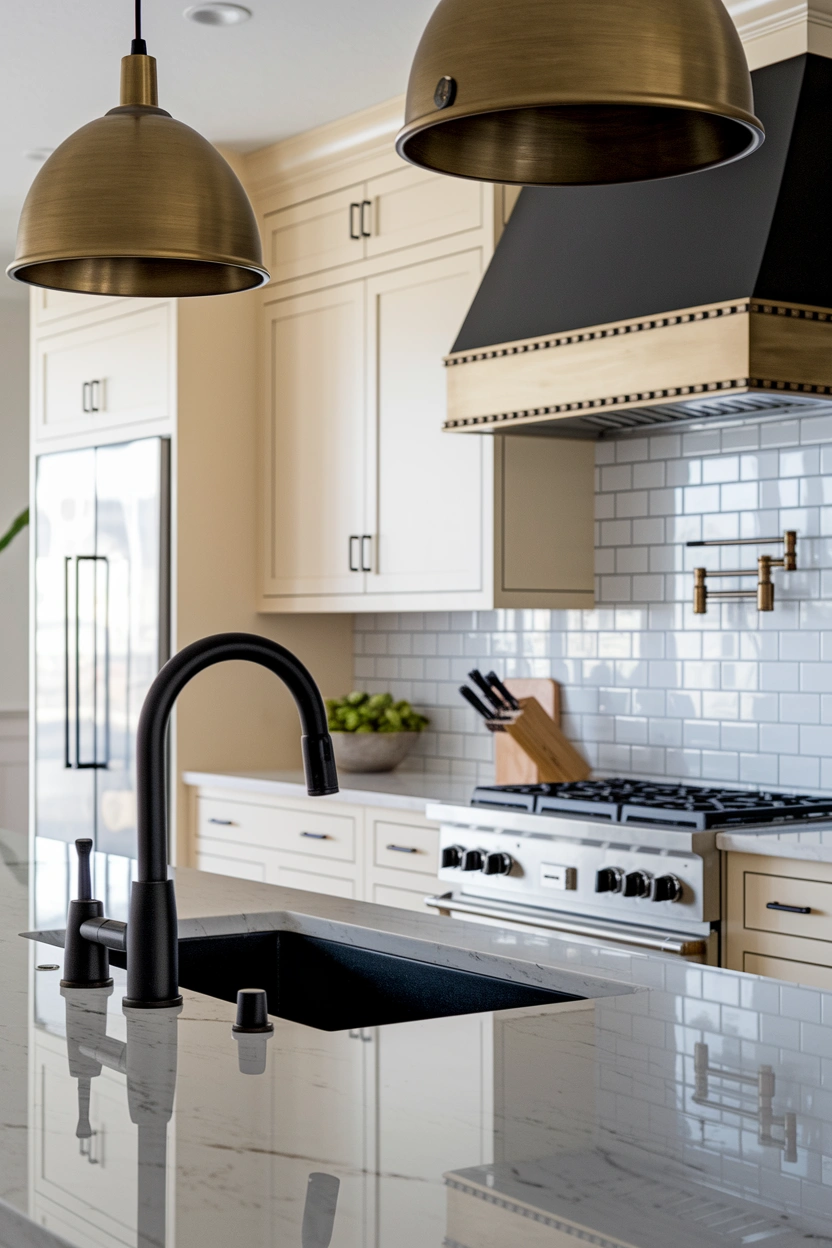
Realistic editorial close-up of a sophisticated kitchen combining brushed brass cabinet handles, a matte black tap, stainless-steel cooker, and aged bronze pendant lights, warm white cabinetry, veined quartz worktop, balanced modern styling, soft natural daylight, clean reflective details, strong focus on the coordinated mixed-metal finishes, no people, no text overlay, high-resolution Pinterest-friendly 2:3 vertical composition, small subtle “AstheticHaven” watermark placed discreetly in the lower corner.


Using only one metal finish can feel safe, but mixing two or three finishes often creates a more natural and layered kitchen. Brass brings warmth, matte black adds definition, chrome feels bright, and stainless steel connects easily with appliances. The finishes do not need to match perfectly, but they should look intentional. Repeating each metal in at least two places helps the design feel connected rather than accidental, especially in kitchens with many handles, taps, lights, and visible appliances.

Choose one dominant finish for the largest group of details, such as cabinet hardware, and use another as an accent. For example, pair brass handles with black pendant lights and a black tap. Stainless-steel appliances can act as a neutral finish and do not always need matching accessories. Avoid using too many different tones in a small room. A controlled mix adds depth and interest while allowing each fitting to stand out without competing with the overall kitchen design.

17. Add Personality with Patterned Flooring
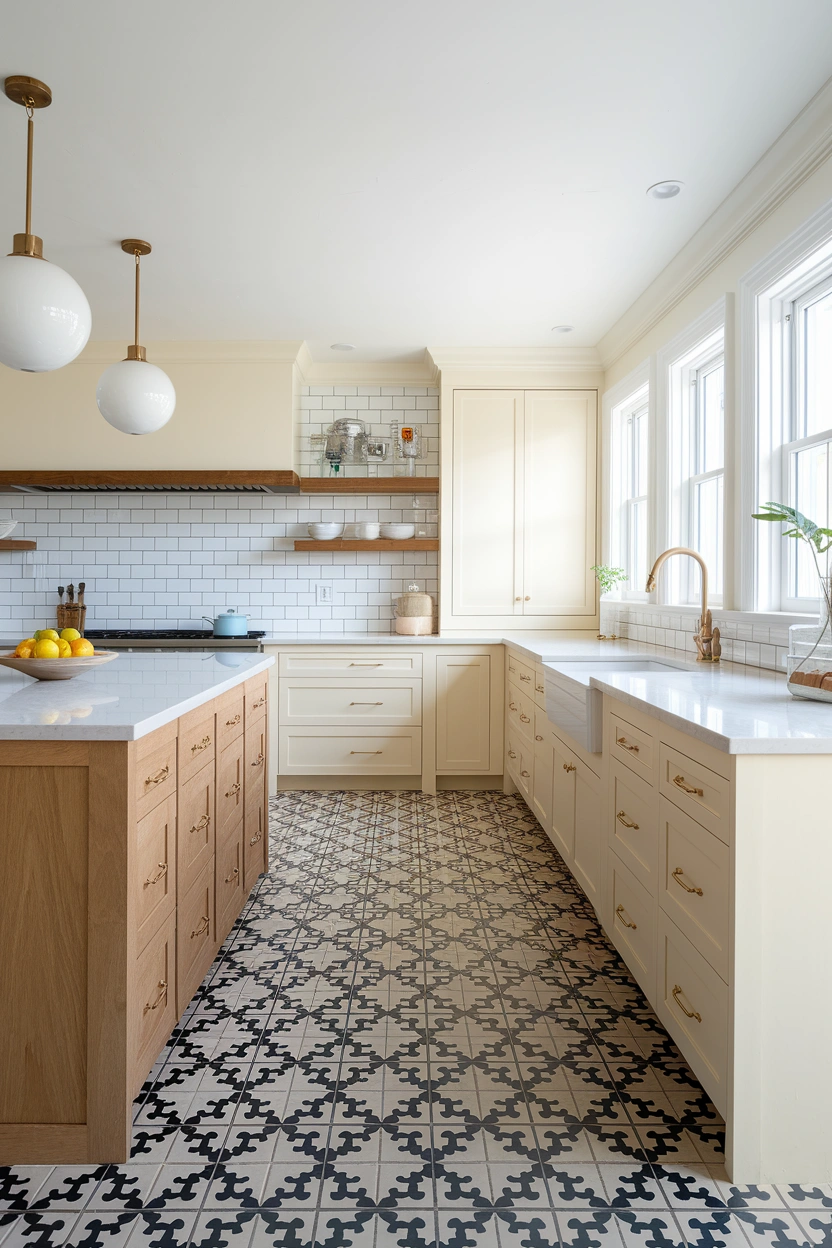
Realistic modern editorial kitchen photograph with striking black-and-cream patterned floor tiles, simple warm-white cabinets, natural oak island, pale quartz surfaces, minimal brass fixtures, bright daylight, uncluttered counters, balanced composition, strong visual focus on the patterned kitchen floor, sophisticated yet practical family-home styling, no people, no text overlay, high-quality Pinterest and blog-friendly image, 2:3 vertical aspect ratio, small subtle “AstheticHaven” watermark near the lower edge.


Patterned flooring can bring energy to a kitchen without using valuable wall or worktop space. Checkerboard tiles create a timeless look, while geometric patterns feel sharper and more modern. Softly aged designs work well in traditional or rustic kitchens. Because flooring covers a large area, the pattern will influence the whole room. Keeping the cabinets and splashback simple allows the floor to become a confident feature without making the kitchen feel crowded, busy, or difficult to decorate.

Consider the room size before choosing the scale of the pattern. Smaller patterns can add detail to compact kitchens, while large designs often look better across open floors. Select durable, slip-resistant materials that can handle spills, foot traffic, and regular cleaning. Order extra tiles for future repairs, especially when using distinctive patterns. If permanent flooring feels risky, try a washable patterned runner first. The right floor can make even basic cabinets feel more personal and thoughtfully designed.

18. Create Impact with a Tiled Splashback
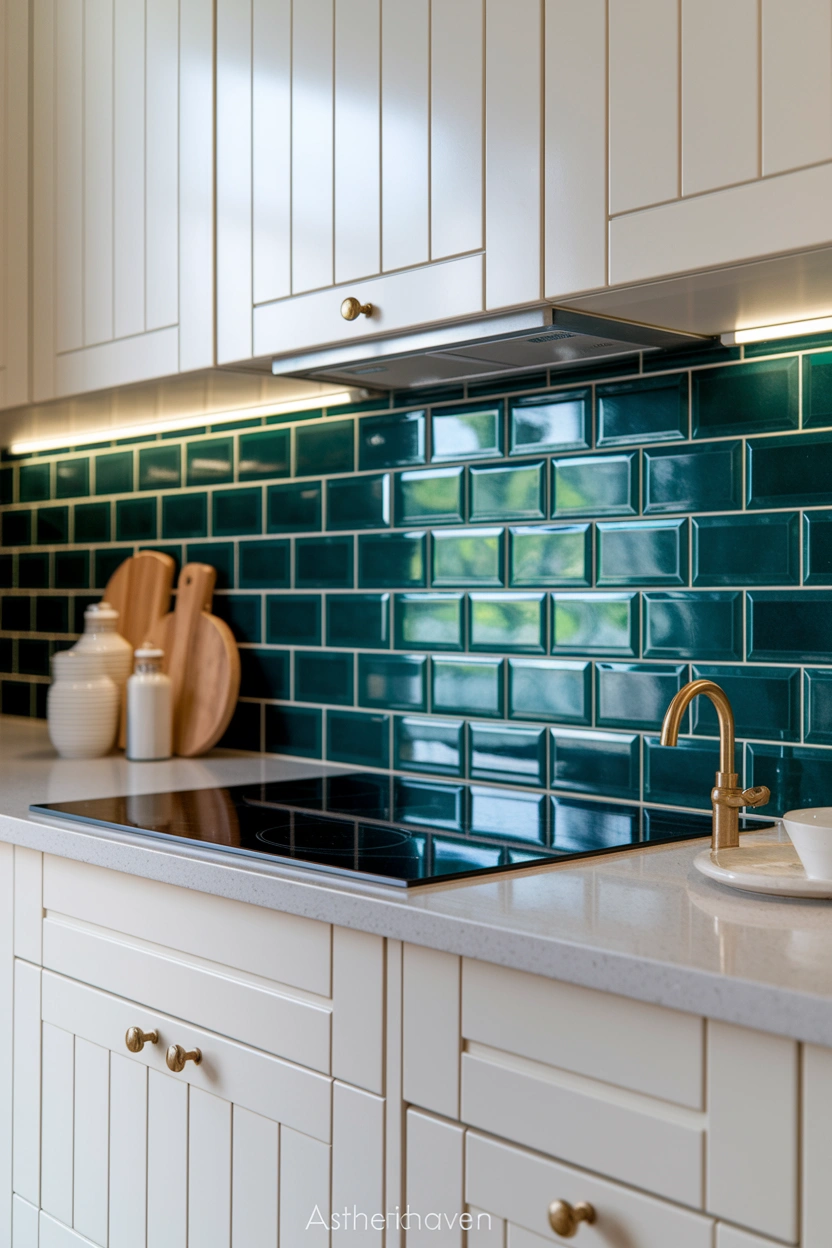
Close-up realistic editorial photograph of a kitchen cooking wall featuring handmade glossy green zellige tiles, warm white shaker cabinets, pale quartz worktop, simple brass pot filler, soft under-cabinet lighting, subtle variations in tile colour and texture, minimal cooking accessories, clean Pinterest-friendly styling, strong focus on the tiled splashback, no people, no text overlay, high-resolution 2:3 vertical composition, subtle “AstheticHaven” watermark positioned in the bottom corner.

A tiled splashback protects the wall while adding colour, texture, and pattern near eye level. Subway tiles create a clean classic look, but changing the layout to herringbone or vertical stacking makes them feel fresher. Handmade tiles reflect light through their uneven surfaces, while patterned tiles can become a strong focal point behind the hob. Extending tiles to the ceiling can also make the cooking wall feel taller, more finished, and more visually connected to the cabinets.

Choose grout carefully because it changes how strongly the tile pattern appears. Matching grout creates a softer, seamless surface, while contrasting grout highlights every shape and line. Dark grout may hide stains, but it can make pale tiles look busier. Use washable, heat-resistant materials near the hob and seal porous tiles when necessary. Before buying, place several samples together to see natural colour differences. A well-chosen splashback can refresh the kitchen without replacing cabinets or changing the entire layout.

19. Ground the Room with Black Accents
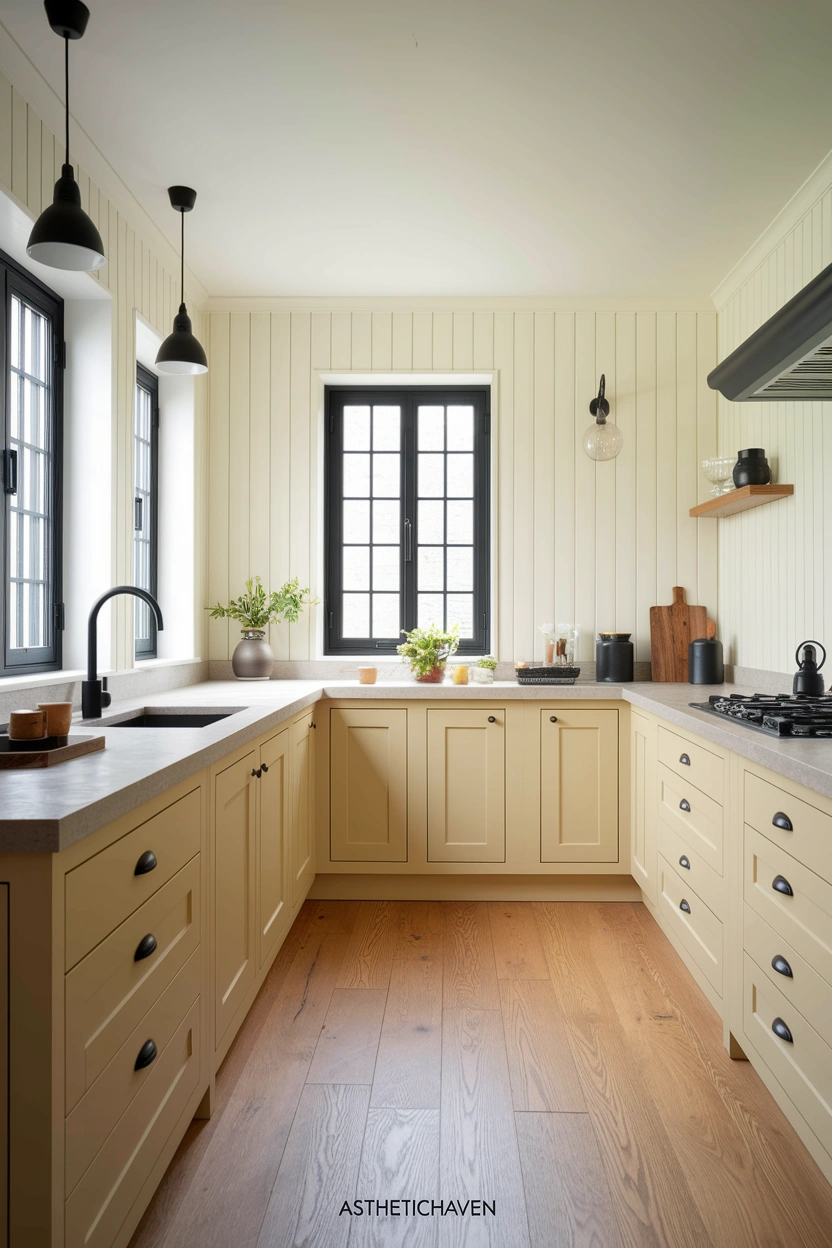
Realistic modern editorial kitchen photograph featuring warm cream cabinets, pale stone counters, natural wood flooring, slim black window frames, matte black tap, black pendant lights, and small black cabinet handles, bright natural daylight, airy uncluttered styling, balanced use of dark accents, strong focus on black details throughout the kitchen, no people, no text overlay, high-resolution Pinterest-friendly 2:3 vertical composition, subtle “AstheticHaven” watermark near the bottom.


Black accents give a light kitchen definition and help individual features stand out. Small details such as handles, taps, window frames, stools, or pendant lights can create a clear visual rhythm without making the room dark. Black works especially well with white, cream, pale wood, and soft green. It also connects modern appliances with the rest of the design. Used carefully, these accents make simple kitchen design ideas feel sharper, more balanced, and more intentional.

Repeat black in a few areas rather than placing one isolated dark feature in the room. A black tap can connect with lighting, hardware, or chair frames across the kitchen. Keep the amount controlled if the room is small or receives limited daylight. Matte black often feels softer than glossy finishes and hides fingerprints more easily. You can also introduce black through removable pieces, such as stools or artwork. This makes the look easier to adjust when your taste changes.

20. Warm the Kitchen with Natural Wood
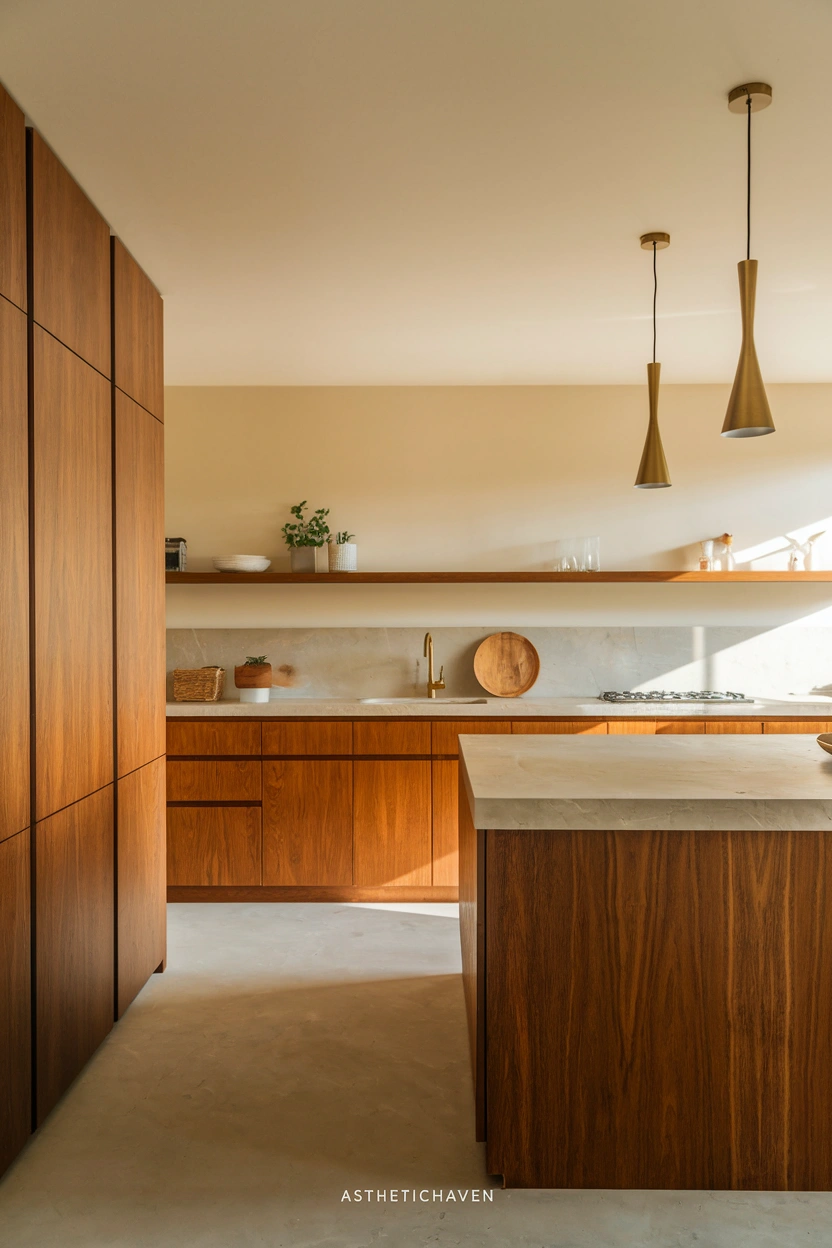
Realistic warm editorial kitchen photograph featuring rich natural oak cabinets, a large wood-panelled island, pale stone worktops, simple cream walls, brushed brass lighting, visible wood grain, soft afternoon sunlight, minimal decorative accessories, cosy modern atmosphere, clean Pinterest-friendly layout, strong focus on natural timber surfaces and texture, no people, no text overlay, high-resolution vertical 2:3 composition, small subtle “AstheticHaven” watermark placed in the lower corner.


Natural wood can soften the hard surfaces found in most kitchens and make the room feel more welcoming. Oak, walnut, ash, and pine each bring a different colour and grain pattern. Wood works beautifully on cabinets, islands, shelves, stools, and ceiling beams. You can use it as the main material or introduce it through smaller details. Pairing wood with pale stone and simple walls keeps the room fresh rather than heavy, especially when the timber has a warm finish.

Consider how the wood tone will work with the flooring, worktops, and surrounding furniture. Similar undertones create a calm effect, while contrasting light and dark woods add depth. Use moisture-resistant finishes near sinks and cooking areas, and clean spills before they soak into the surface. Veneered cabinets can provide the appearance of real timber with more consistent grain and lower cost. A thoughtful use of wood brings lasting warmth and character to almost every kitchen style.

21. Give the Ceiling More Attention

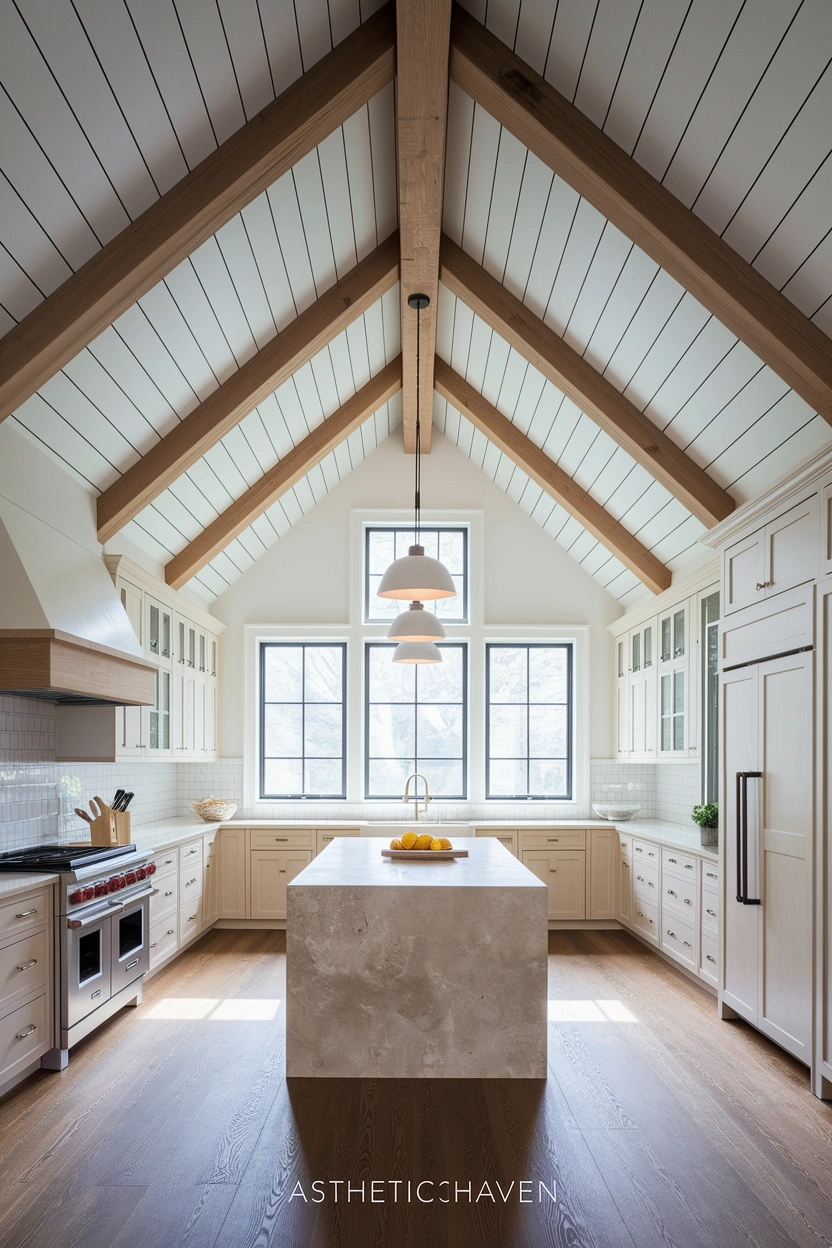
Realistic editorial kitchen photograph with a striking ceiling treatment featuring exposed natural oak beams, soft white tongue-and-groove panels, warm pendant lights, pale cabinets, central stone island, bright daylight from large windows, balanced architectural composition, clean and inviting styling, strong focus on the detailed ceiling above the kitchen, no people, no text overlay, high-resolution Pinterest and blog-friendly 2:3 vertical image, subtle “AstheticHaven” watermark near the bottom edge.


The ceiling is often ignored, yet it can add important character to a kitchen. Timber beams bring warmth and structure, while tongue-and-groove panelling creates a relaxed cottage feel. A darker painted ceiling can make a large room feel cosier, and simple decorative trim can give a plain space more depth. In open-plan kitchens, a ceiling treatment can also define the cooking zone without adding walls, helping the area feel separate while remaining visually connected to the surrounding rooms.

Use ceiling details in proportion with the height and size of the room. Heavy beams may overwhelm a low ceiling, but slim decorative beams or pale panelling can still add interest. Keep strong ceiling treatments balanced with quieter cabinetry and lighting. When painting overhead surfaces, test the colour because it may appear darker than it does on a wall. A carefully finished ceiling draws the eye upward and makes the kitchen feel complete from every viewing angle.

22. Add a Window Seat for Extra Comfort
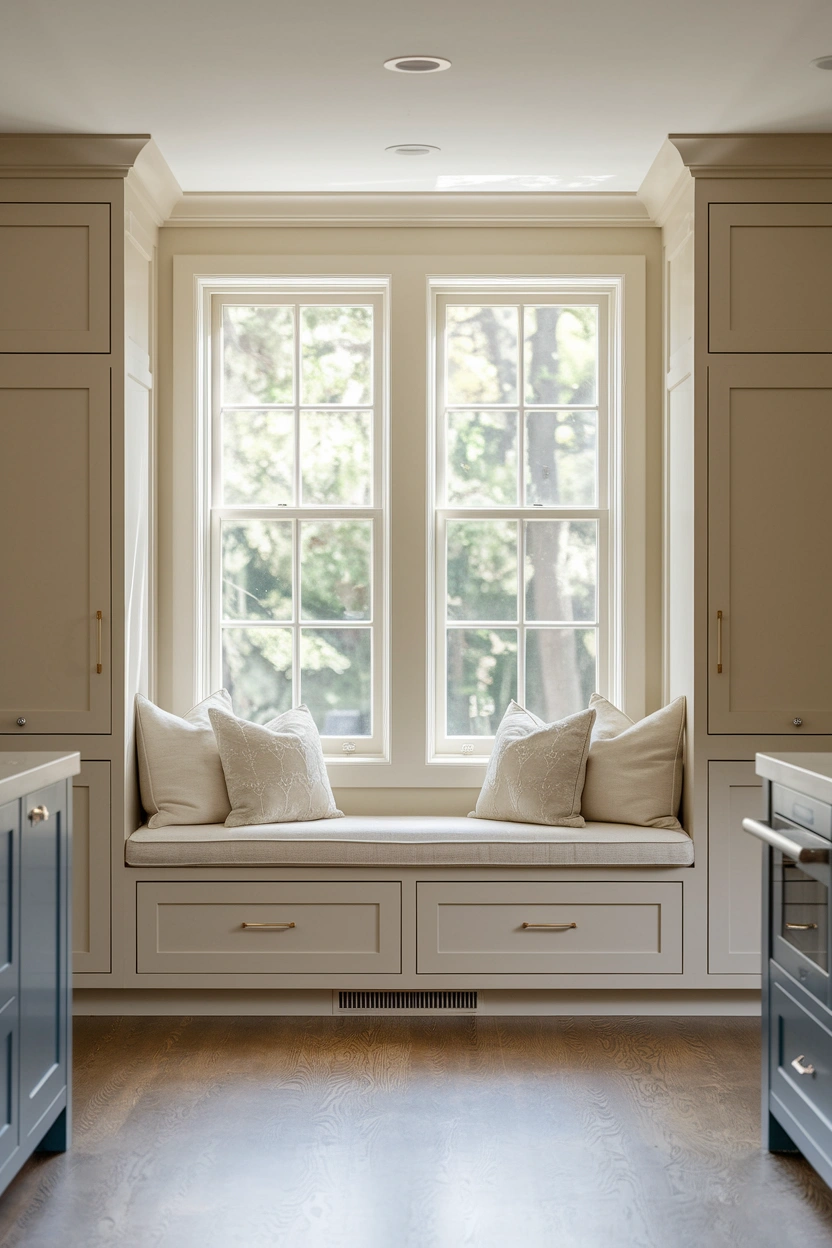
Realistic modern editorial kitchen photograph featuring a built-in window seat beneath a wide sunlit window, deep storage drawers below, neutral upholstered cushion, soft patterned pillows, nearby pale cabinetry, oak floor, small side table, warm natural light, peaceful uncluttered atmosphere, strong focus on the kitchen window seat, no people, no text overlay, high-quality Pinterest and blog-friendly 2:3 vertical composition, small subtle “AstheticHaven” watermark in the lower corner.


A window seat can turn an overlooked part of the kitchen into a peaceful and useful feature. It provides a comfortable place for someone to sit without occupying the main cooking area. Built-in drawers beneath the seat can hold table linen, serving dishes, or rarely used appliances. Positioned beside natural light, the seat can become a favourite spot for reading, drinking tea, or keeping company with the cook while staying safely away from hot surfaces and busy work zones.

Use firm, washable fabric for the seat cushion and avoid placing delicate materials where they receive strong sunlight. The seat height should feel comfortable and allow storage drawers or lifting lids to open easily. Add only a few cushions so the area remains practical. If the window is near a dining table, the seat can also provide extra mealtime seating. This simple feature adds softness to the kitchen and makes the room feel more connected to everyday family life.

23. Create a Dedicated Coffee Station
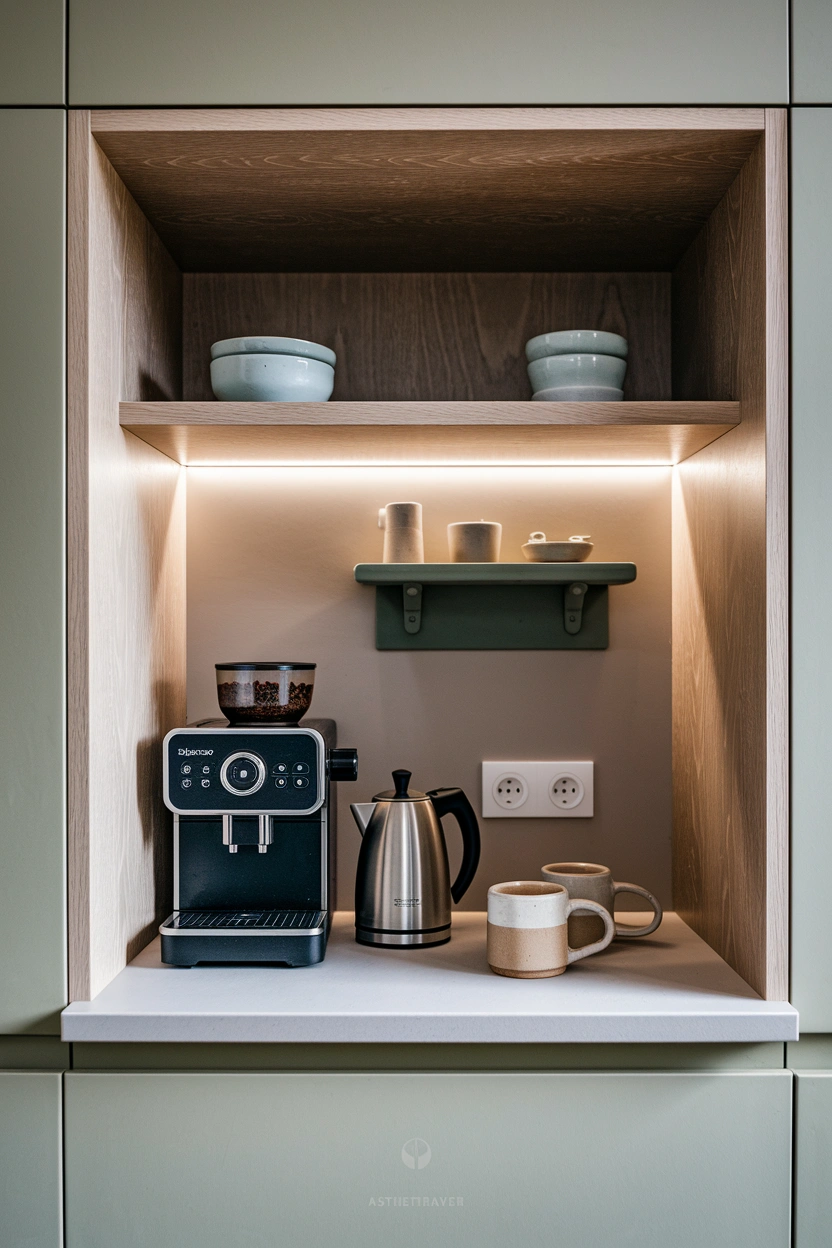
Realistic close editorial kitchen photograph of a stylish built-in coffee station with espresso machine, electric kettle, ceramic mugs, small shelf for coffee beans, hidden storage drawers, warm oak cabinet interior, pale stone counter, subtle under-shelf lighting, clean organised styling, strong focus on the coffee preparation area, no people, no text overlay, high-resolution Pinterest-friendly 2:3 vertical composition, small subtle “AstheticHaven” watermark in the lower corner.


A dedicated coffee station keeps morning essentials together and prevents the main preparation area from becoming crowded. It can fit inside a cabinet, along an unused section of worktop, or within a pantry. Include the coffee machine, kettle, mugs, spoons, beans, tea, and sweeteners in one organised zone. A small shelf or drawer makes supplies easy to reach. When everything has a clear place, preparing drinks becomes faster and the rest of the kitchen stays calmer throughout the day.

Position the station near a water source when possible, but keep it away from the busiest cooking path. Install sockets at a practical height and leave enough space above appliances for steam. A wipeable splashback protects the wall from spills, while under-shelf lighting makes early mornings easier. Use matching containers to reduce visual clutter, but label anything that might be confusing. A thoughtfully arranged drinks station brings a small sense of luxury to an ordinary daily routine.

24. Design a Pantry That Stays Organised
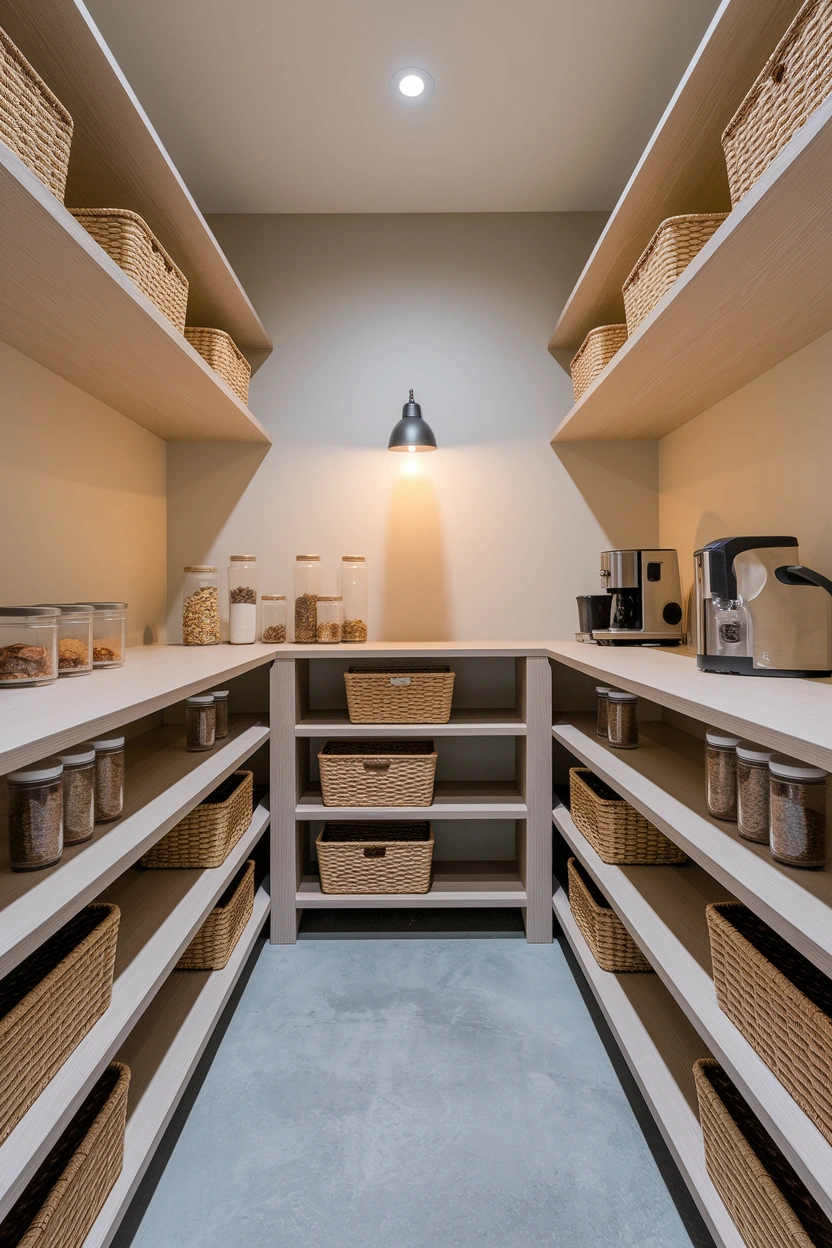
Realistic modern editorial photograph of a beautifully organised walk-in kitchen pantry with adjustable oak shelving, pull-out baskets, clear food containers, neatly grouped jars, small countertop for appliances, warm wall lighting, pale neutral walls, uncluttered floor, practical family-friendly arrangement, strong focus on accessible pantry organisation, no people, no text overlay, premium high-resolution Pinterest composition, vertical 2:3 aspect ratio, subtle “AstheticHaven” watermark near the bottom edge.


A well-designed pantry makes shopping, cooking, and meal planning easier because food remains visible and accessible. Adjustable shelves allow the space to change as your storage needs develop. Deep drawers work well for packets and snacks, while shallow shelves prevent tins and jars from disappearing behind one another. Baskets can group baking supplies, breakfast foods, or children’s snacks. Even a small cupboard can function like a pantry when shelves, door racks, and containers use every area efficiently.

Group items by purpose rather than size so everything needed for one task sits together. Keep frequently used food between waist and eye level, and place heavier supplies on lower shelves. Clear containers help you see when ingredients are running low, but there is no need to transfer every product from its original packaging. Leave a little empty space for new groceries. An organised pantry should make everyday life easier, not create another complicated system that takes hours to maintain.

25. Use Two Islands in a Large Kitchen
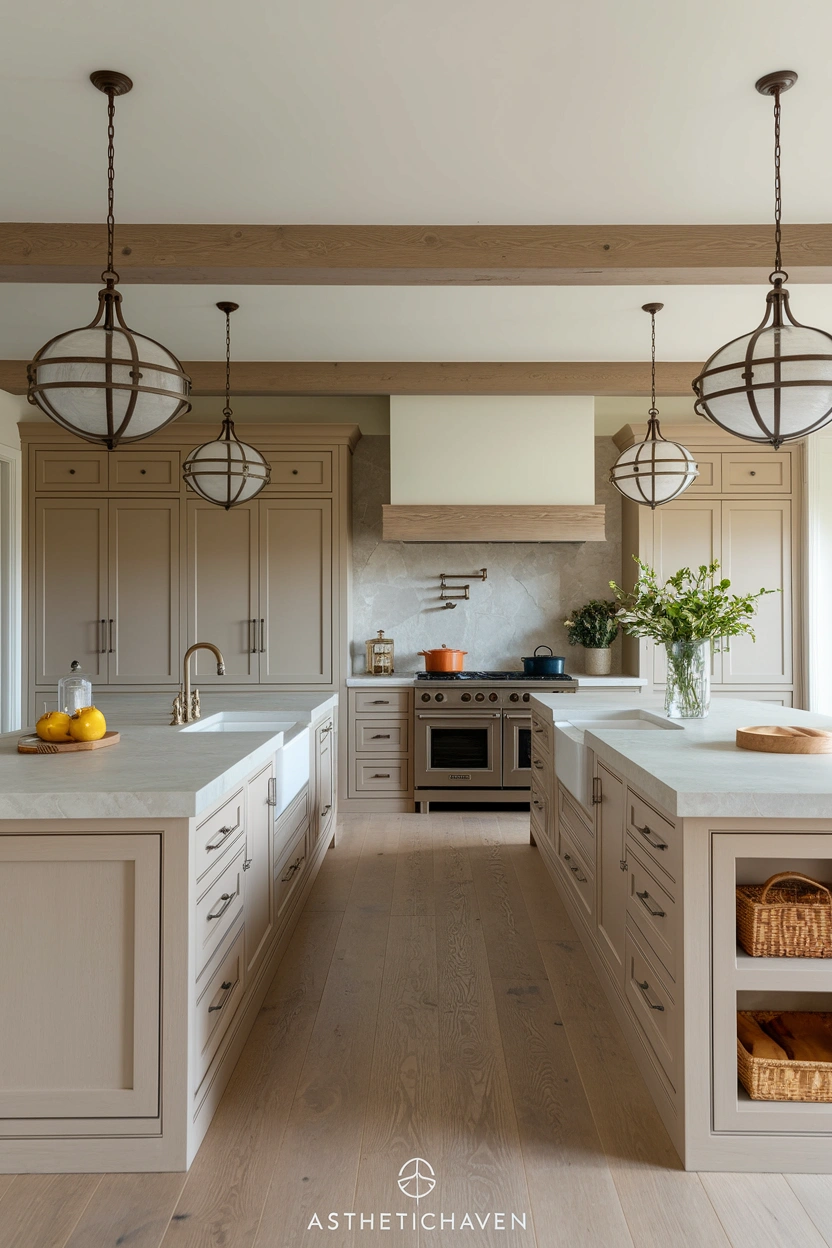
Realistic luxury editorial photograph of a spacious kitchen with two coordinated islands, one dedicated to food preparation with a sink and storage, the other designed for seating and casual dining, warm taupe cabinets, pale stone surfaces, natural oak accents, wide comfortable walkways, elegant pendant lighting, soft daylight, strong focus on the functional double-island layout, no people, no text overlay, premium Pinterest-friendly 2:3 vertical composition, subtle “AstheticHaven” watermark at the bottom.

Two islands can make a very large kitchen feel organised by dividing different activities into clear zones. One island may hold the sink, chopping space, and storage, while the second provides seating, serving space, or room for entertaining. This arrangement works best in wide rooms where a single oversized island would feel difficult to walk around. Separating tasks can also prevent guests from gathering directly beside hot pans, sharp knives, or open appliance doors during busy meals.

Measure the room carefully because double islands require generous space between each unit and the surrounding cabinets. Keep their finishes connected through matching worktops, colours, or hardware so they feel like part of one design. Consider different pendant lights only if each island serves a clearly different purpose. Avoid adding two islands simply to fill empty floor space. When the scale is right, they can improve movement, storage, seating, and the overall balance of a spacious kitchen.

26. Choose a Peninsula When an Island Will Not Fit
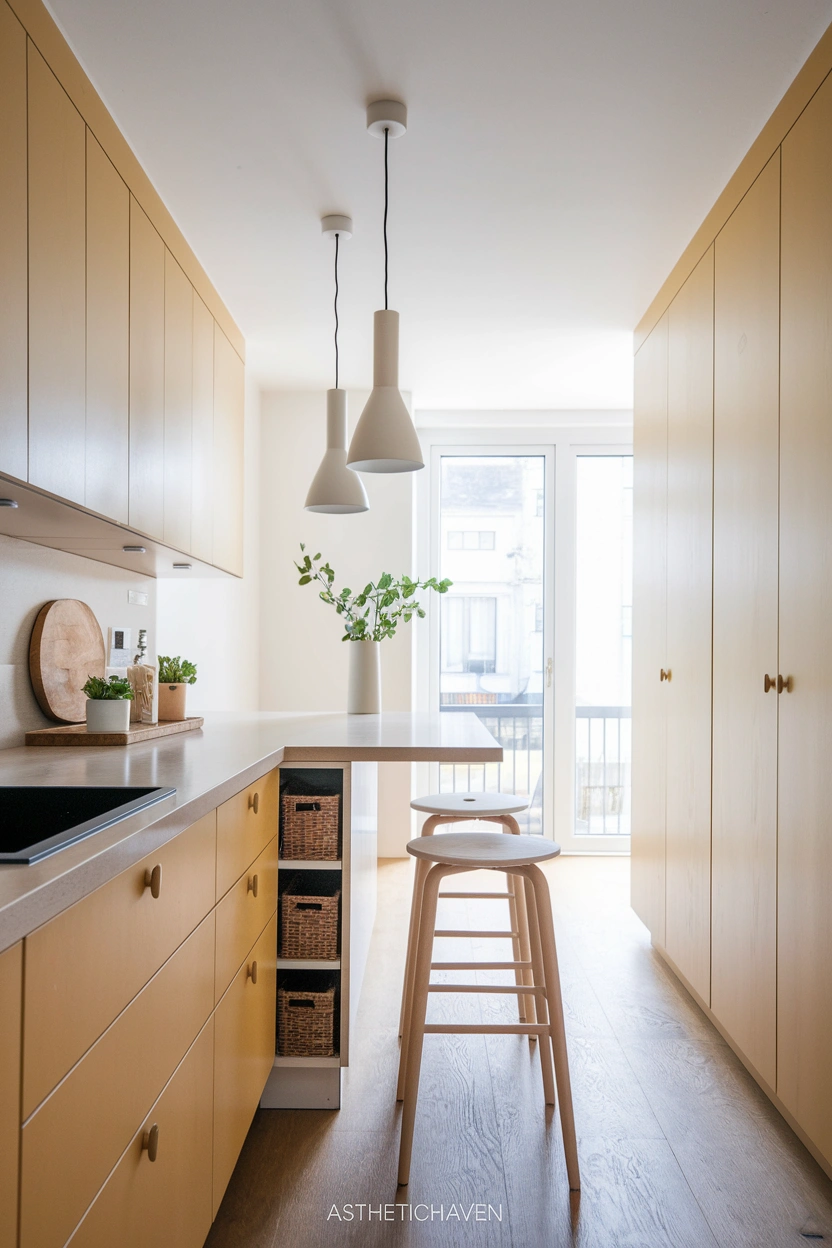
Realistic editorial photograph of a compact modern kitchen with a practical peninsula extending from the cabinets, pale quartz worktop, storage drawers below, two tucked-in counter stools, warm white cabinetry, natural oak floor, pendant lighting, clear walkway, bright natural daylight, clean blog-friendly composition, strong focus on the space-saving peninsula, no people, no text overlay, high-resolution 2:3 vertical Pinterest image, small subtle “AstheticHaven” watermark near the bottom.


A peninsula offers many benefits of an island while using less floor space. Because one end connects to a wall or cabinet run, it can provide extra worktop, storage, seating, or a place for the hob or sink. Peninsulas work well in smaller kitchens and can create a gentle boundary between cooking and living zones. They are also useful when the room is too narrow to allow comfortable walkways around all four sides of a freestanding island.

Keep the peninsula slim enough to preserve easy movement through the kitchen. Rounded corners can make a tight walkway safer, especially in homes with children. Use stools that fit fully beneath the counter so they do not block the room when not in use. Pendant lighting can define the feature, but choose small fittings that do not overwhelm the space. A well-proportioned peninsula can add valuable function without making a compact kitchen feel closed or difficult to navigate.

27. Select Compact Appliances for a Small Space
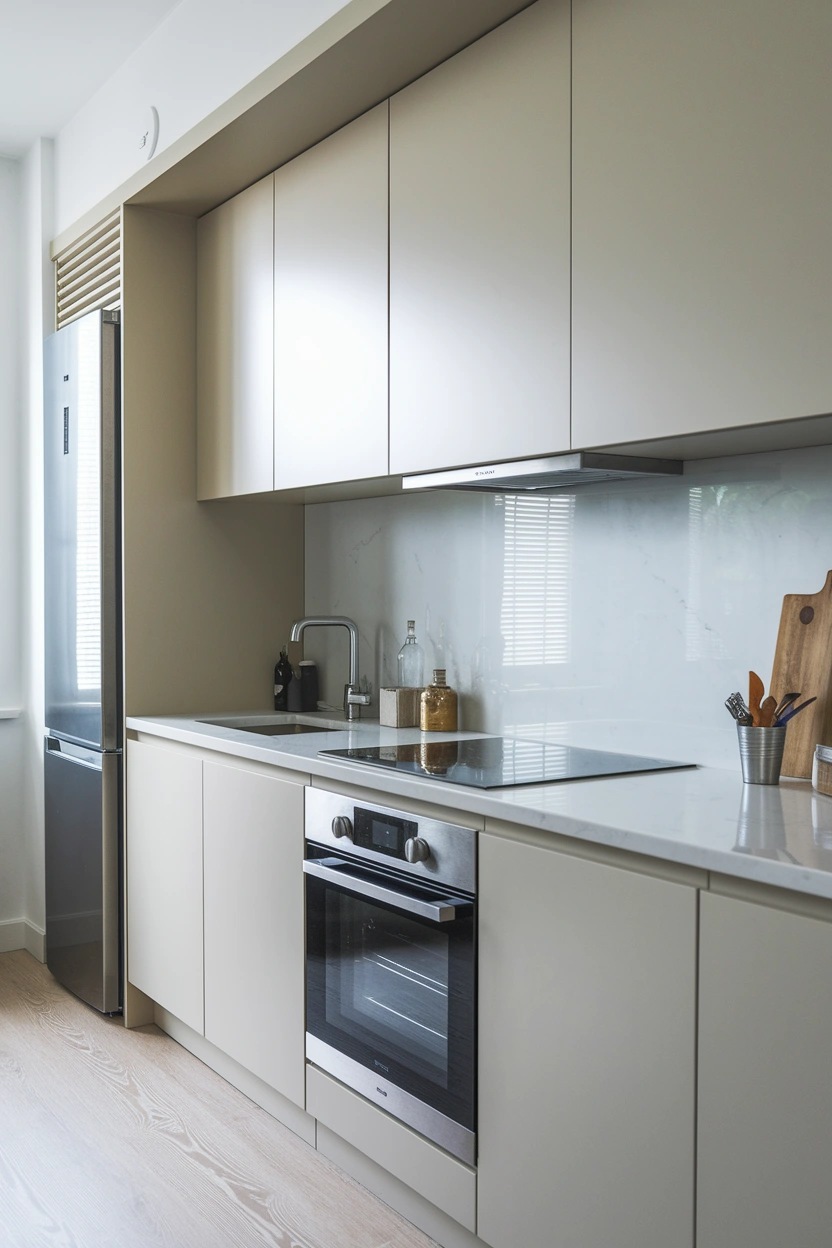
Realistic modern editorial photograph of a small apartment kitchen with slimline dishwasher, compact built-in oven, narrow refrigerator, two-zone induction hob, pale handleless cabinets, light quartz worktops, integrated storage, bright window light, clean uncluttered styling, strong focus on compact space-saving appliances, no people, no text overlay, high-quality Pinterest and blog-friendly 2:3 vertical composition, subtle “AstheticHaven” watermark in the lower corner.


Compact appliances allow a small kitchen to provide full function without sacrificing too much storage or worktop space. Slim dishwashers, narrow refrigerators, combination microwave ovens, and two-zone induction hobs can suit apartments, guest homes, or households that cook smaller meals. Choosing appliances based on your real routine is more practical than automatically buying the largest models available. Smaller units can also reduce visual weight, helping cabinets and counters feel less crowded in a limited room.

Compare internal capacity rather than relying only on exterior measurements. A thoughtfully designed compact refrigerator may hold more than expected, while a combination oven can replace two separate appliances. Make sure smaller models still provide the programmes and features you use regularly. Integrated designs can create an even cleaner appearance. Avoid squeezing in too many appliances simply because compact options exist. The goal is to support daily life while leaving enough space for preparation, storage, and comfortable movement.

28. Install a Workstation Sink


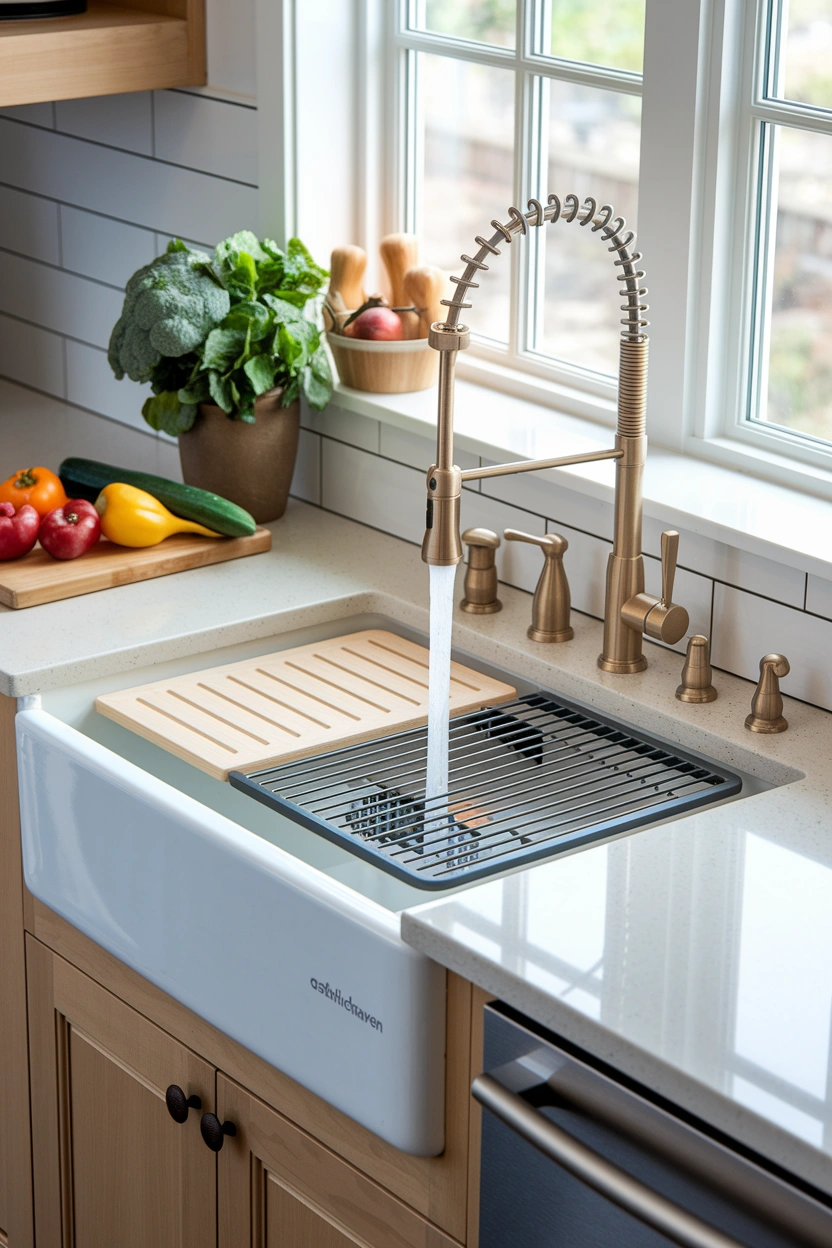
A workstation sink includes fitted accessories that slide across the bowl, creating extra space for chopping, rinsing, draining, and food preparation. Cutting boards, colanders, drying racks, and serving trays can sit directly over the sink, keeping mess contained and freeing nearby worktops. This design is especially useful in small kitchens where every surface matters. It also helps create a more efficient preparation zone by keeping water, waste, ingredients, and tools close together during cooking.

Choose a sink size that suits your cabinet width and everyday washing needs. Deep bowls can hide dirty dishes, but they may feel uncomfortable for shorter users, so test the depth where possible. Look for durable accessories that are easy to remove and clean. A pull-down tap can improve reach, while an integrated soap dispenser keeps the counter clearer. A workstation sink works best when its accessories genuinely support your routine rather than becoming extra pieces that need storage.

29. Add a Pot Filler Above the Hob

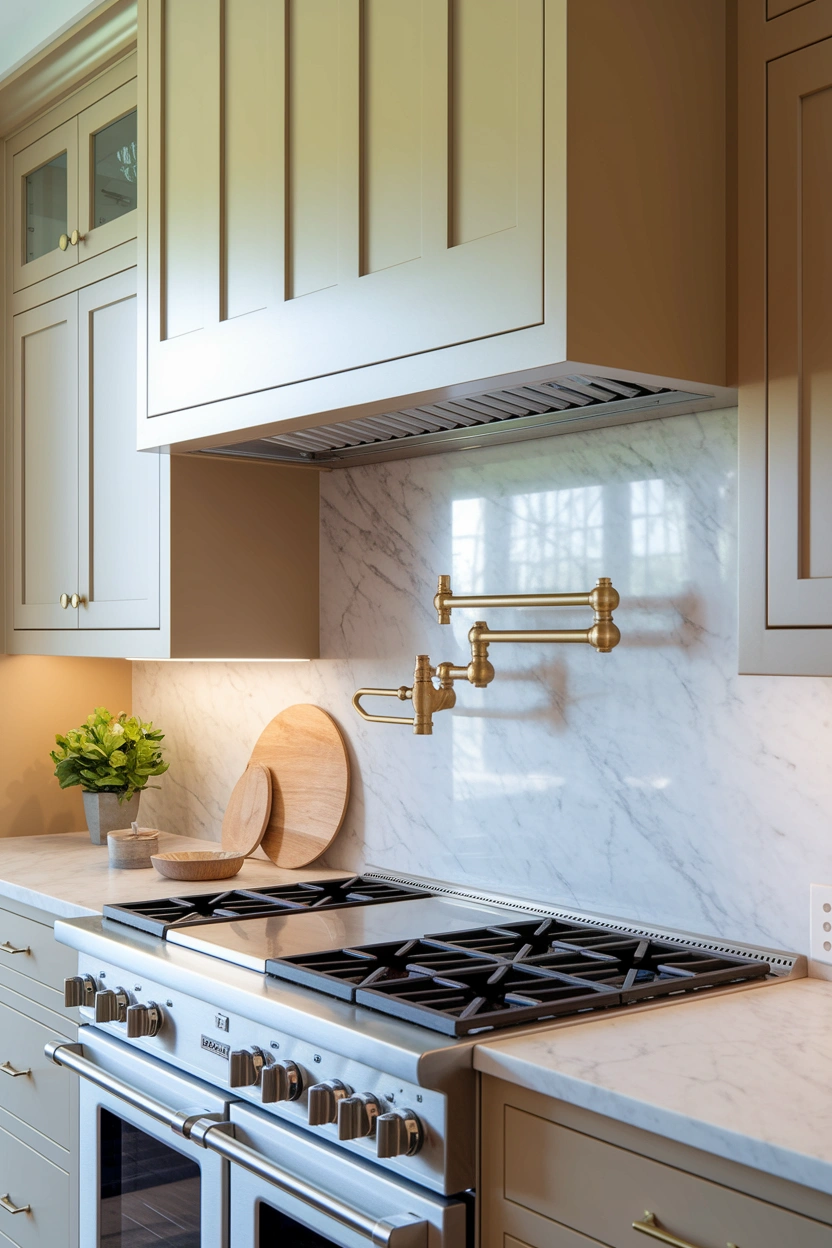
Realistic luxury editorial close-up of a kitchen hob wall with a brushed brass wall-mounted pot filler above a professional range cooker, pale marble-look splashback, warm white cabinets, minimal cookware, soft under-cabinet lighting, balanced symmetrical composition, strong focus on the pot filler and cooking area, no people, no text overlay, premium high-resolution Pinterest-friendly 2:3 vertical image, small subtle “AstheticHaven” watermark in the bottom corner.


A pot filler is a folding tap installed above the hob, allowing large pans to be filled without carrying them from the sink. It can be useful for people who regularly prepare pasta, soup, or large family meals. Beyond its practical purpose, a pot filler also creates a polished focal point on the cooking wall. Brass, black, or stainless-steel finishes can connect with nearby hardware and give the cooker area a more customised and professional appearance.

Plan the height and position carefully so the tap reaches your largest cooking pots without interfering with shelves or the extractor hood. Because a pot filler provides water but no drain, leaks must be prevented through professional installation and reliable fittings. It will not remove the need to carry a full pan back to the sink after cooking. For households that use it regularly, however, this feature can make meal preparation easier and add an attractive finishing detail.

30. Extend the Island with Built-In Dining
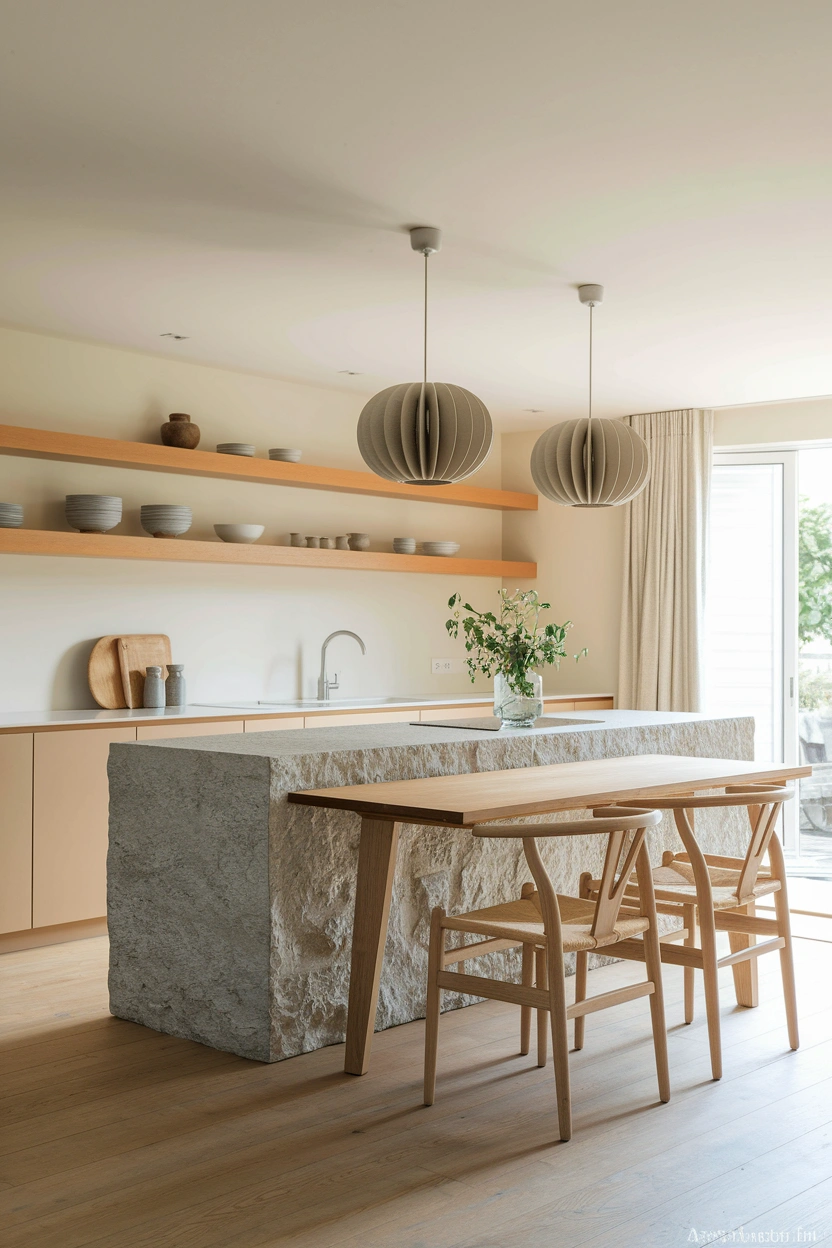
Realistic editorial kitchen photograph featuring a stone island with an attached lower natural oak dining table, four simple chairs, warm neutral cabinetry, sculptural pendant lights, pale wood flooring, clean counters, soft daylight, seamless transition between preparation and dining zones, strong focus on integrated island seating, no people, no text overlay, high-resolution Pinterest and blog-friendly 2:3 vertical composition, subtle “AstheticHaven” watermark near the bottom edge.

Built-in dining can turn an island into a more comfortable place for regular meals. Instead of using high counter stools, extend one end with a lower table-height surface and standard chairs. This arrangement works well for children, older relatives, or anyone who prefers supportive dining seating. The change in height can also break up a large island visually and separate food preparation from eating. Using a contrasting wood finish adds warmth and makes the dining section feel more inviting.

Allow enough legroom beneath the table and leave comfortable space behind every chair. The dining extension should not block appliance doors or major walkways when people are seated. Choose a durable surface that can handle meals, homework, and everyday use. Lighting should sit above the centre of the dining area without interfering with the preparation side. By combining two functions carefully, the island becomes a natural gathering place rather than simply a large block of kitchen storage.

By admin

Leave a Reply

Your email address will not be published. Required fields are marked *